|
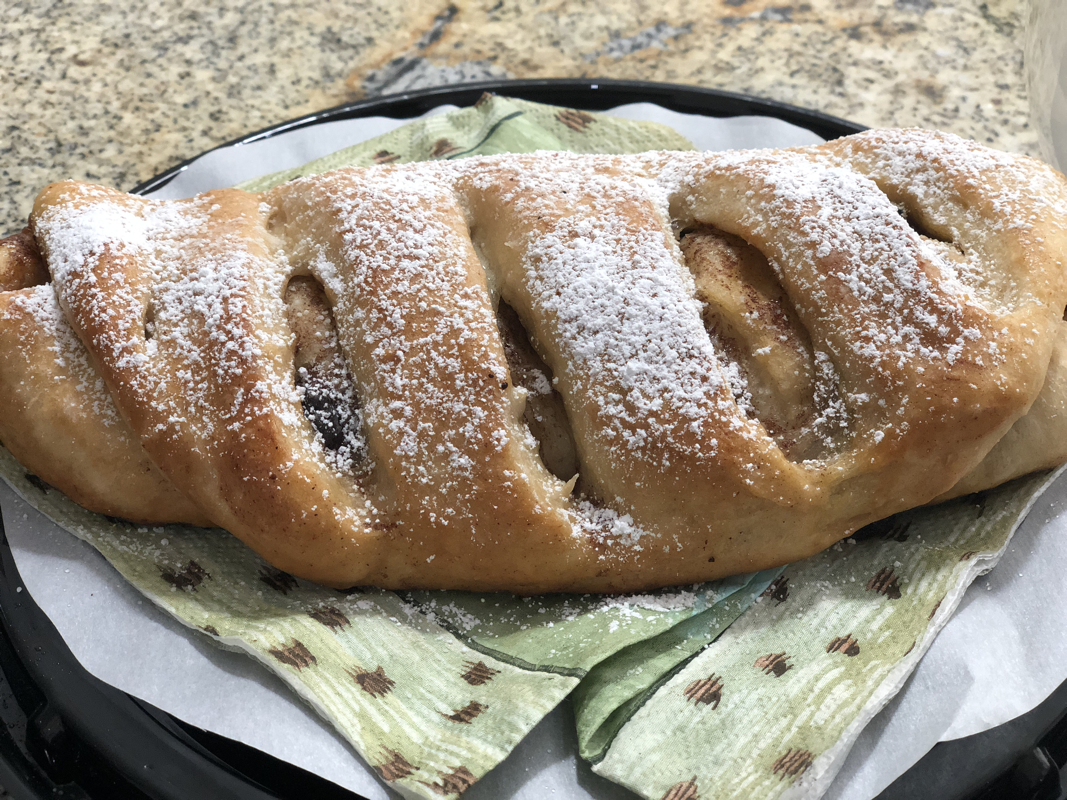
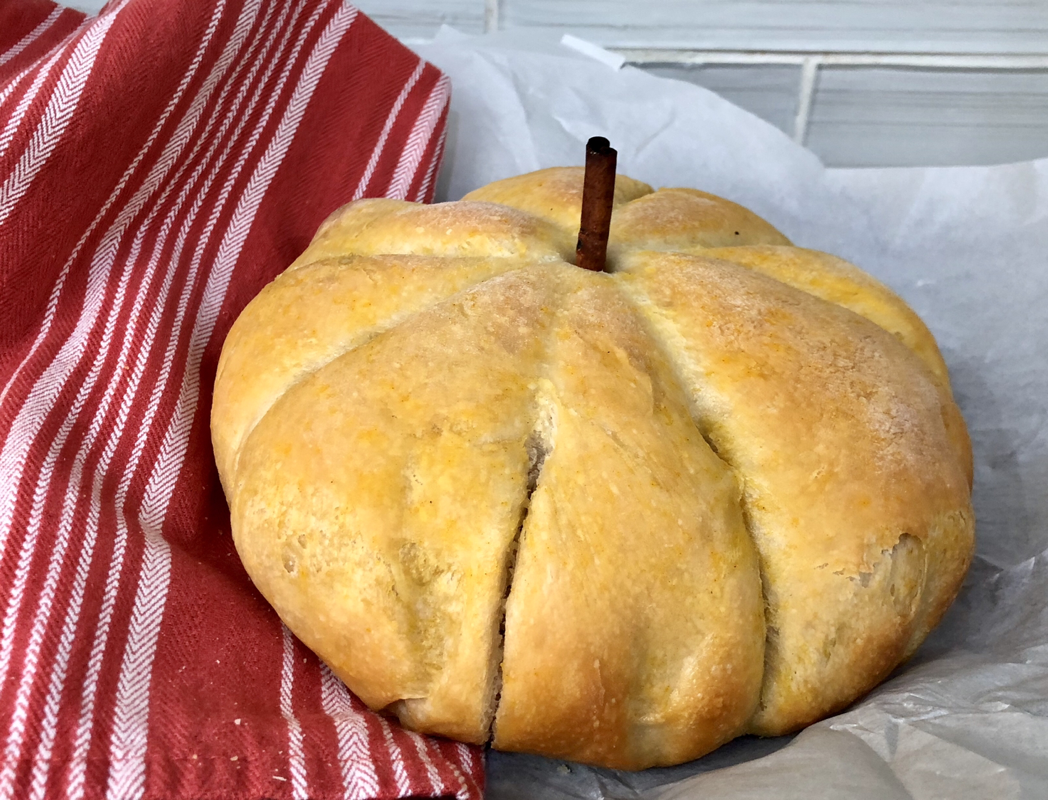
I’m not fond of eating cakes but I used to bake it for the fun of decorating it. Here are some of my creations. 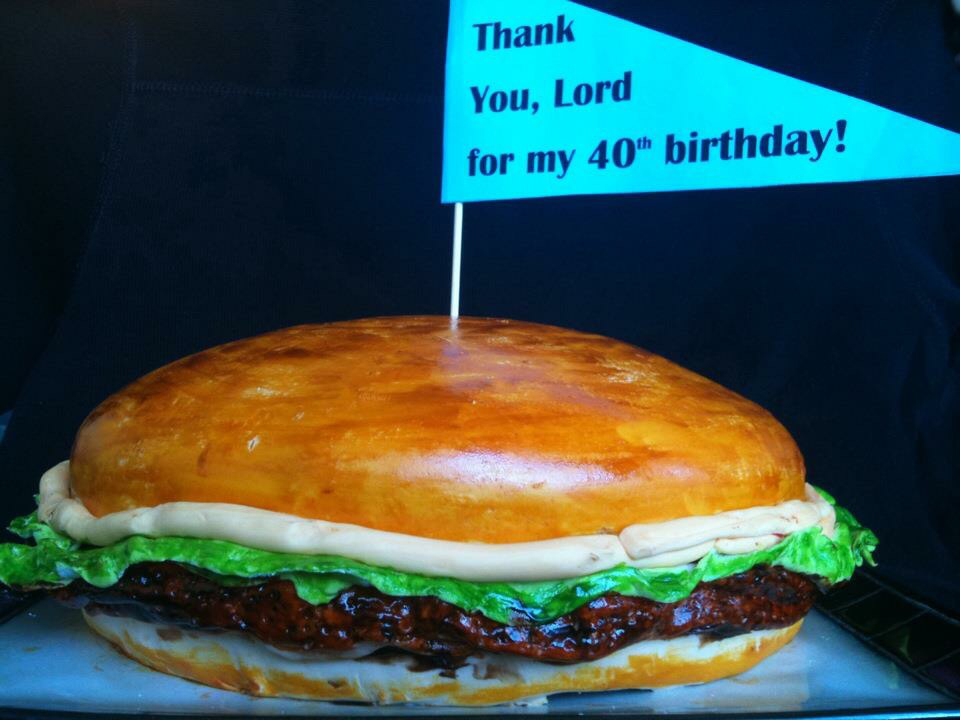 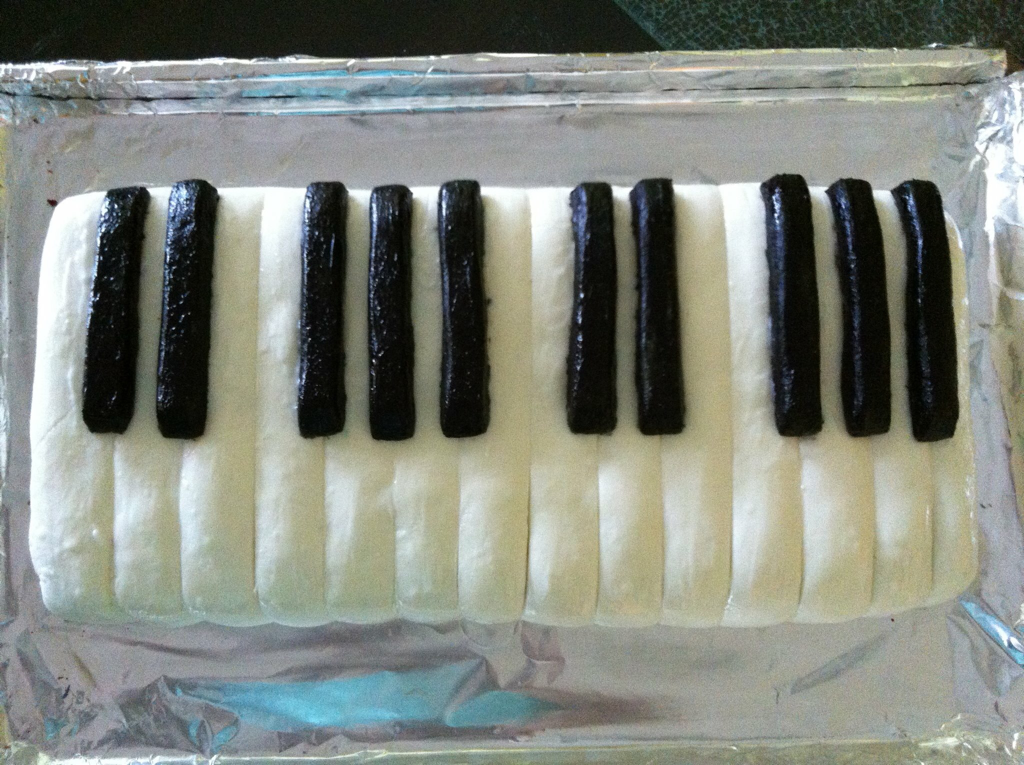 But after a while, I had to abandon it because it was such a pain to finish a whole bundle of sweets. I’m no sweet tooth. In fact, when I was young, I had a sour tooth, if ever there was such a term for someone who craves sour food to be dipped in a bowl of salt. I ate calamansi for snacks (it’s a tropical fruit which is small and tastes like a crossbreed of lemon and lime). I also adored sour, unripe mangoes dipped in anything salty like soysauce, salt, or fermented fish. After discovering my love for sourdough, it was natural to get creative with this very simple bread. I call it simple because the ingredients are so basic: bread flour, oil, water, salt, and natural sweetener, which for me is not sugar cane but maple syrup. But the resulting bread is so soft, you think I added a bunch of milk and eggs in it. And even when it had been more than three days in the refrigerator, it still stays soft. Anyway, when the school where my daughter attends asked for cake donations, I refused to bake cake but volunteered my sourdough bread instead. To make it extra fancy and special, befitting a Cake Walk, I made raisin sourdough bread and pumpkin-shaped sourdough bread. Below are some pictures from this creative stint. I wish I knew how the raisin bread tasted because it was my first time to have baked that. Hopefully my gut instinct was right.
The pumpkin bread hopefully paired well with the chimichurri-pumpkin spice dip. But for the love of art, I think this was worth the effort and very satisfying.
0 Comments
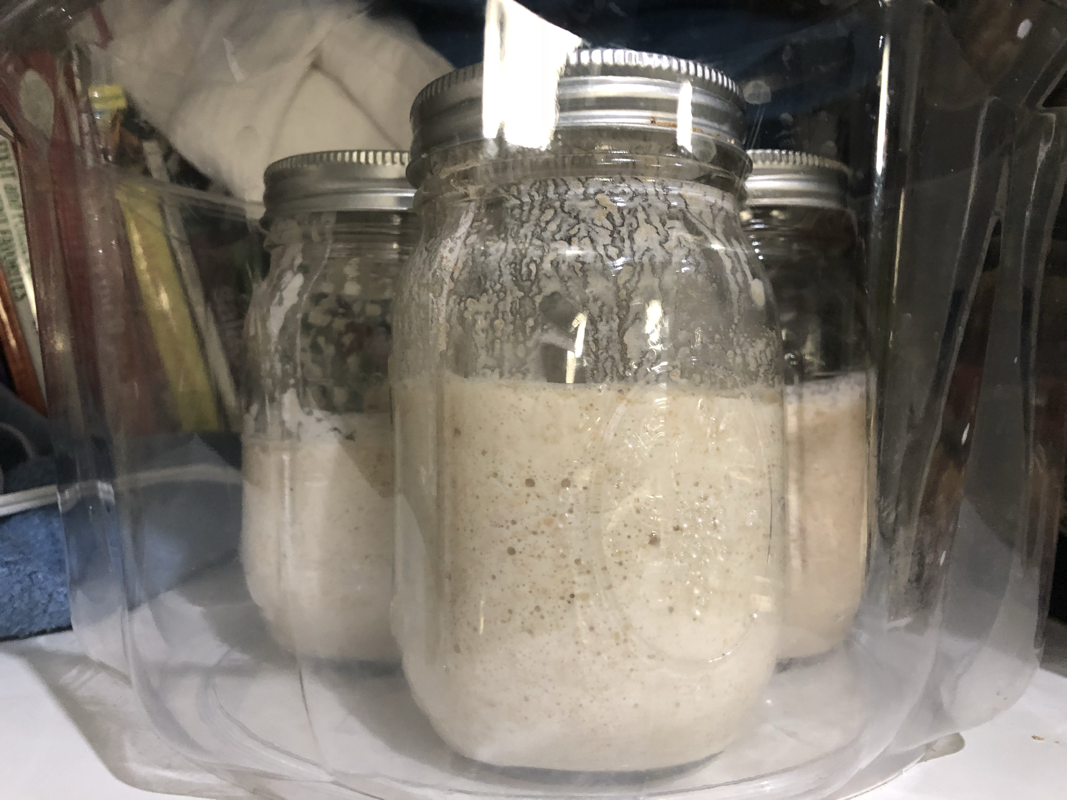
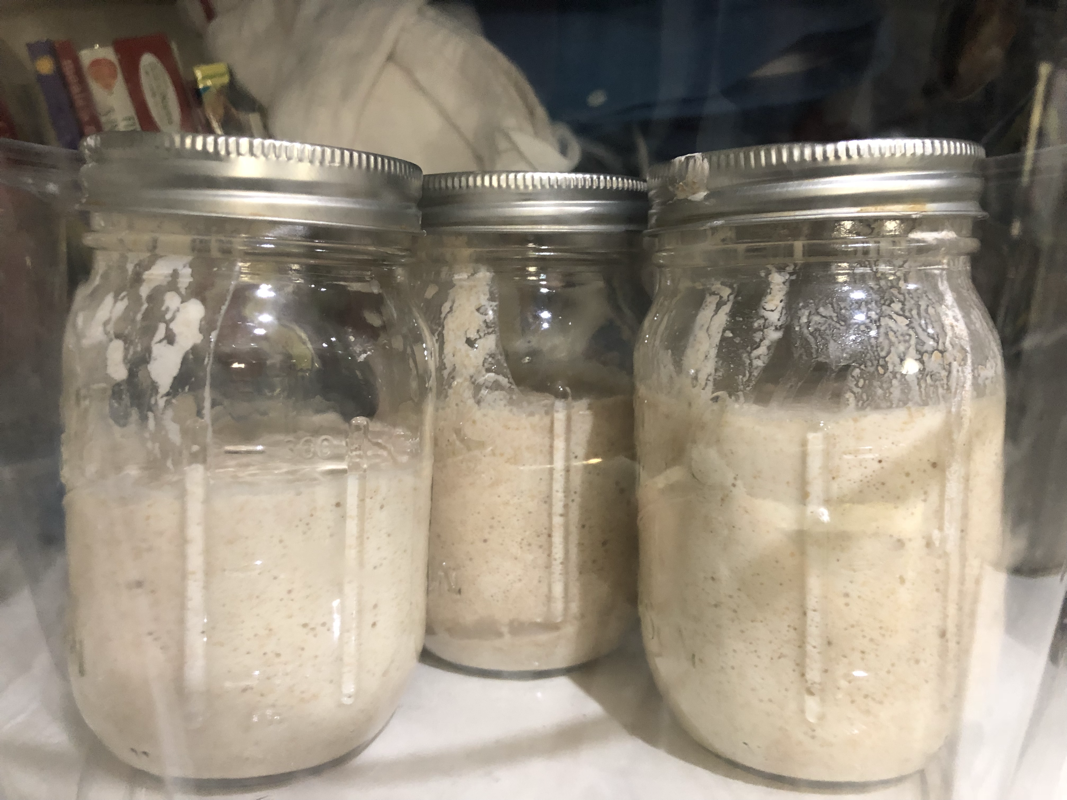
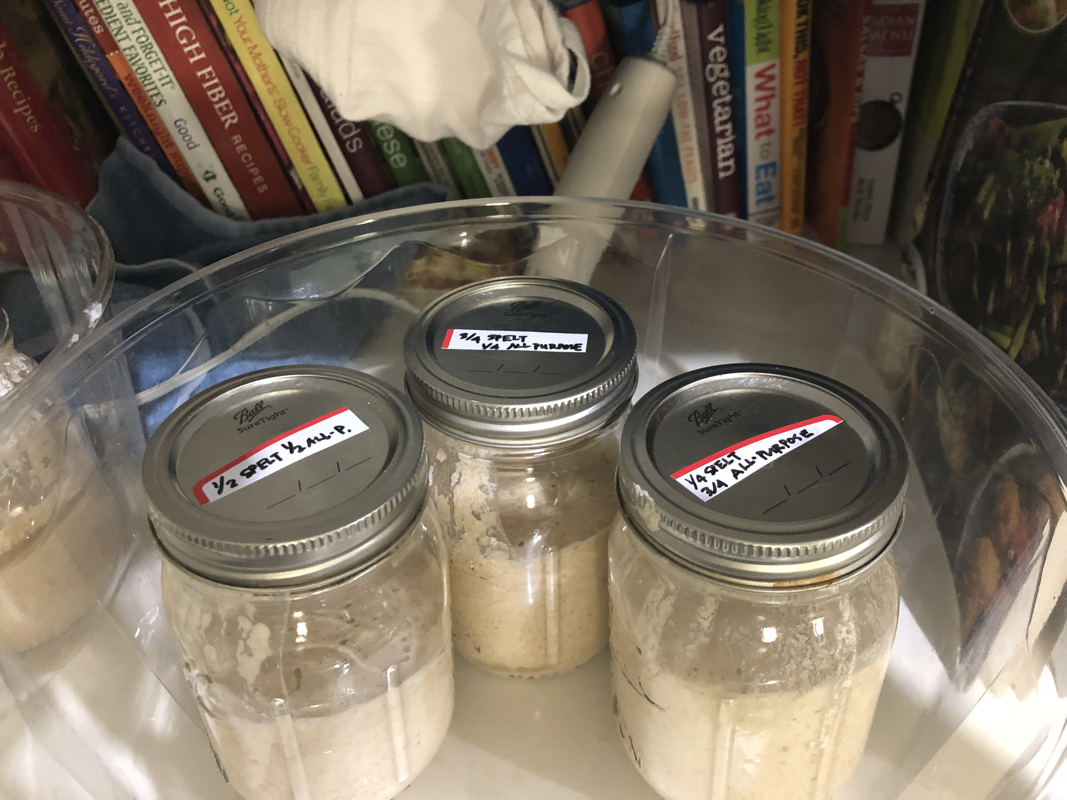
After reading all these posts about spelt and semolina flour, I decided to play with my sourdough starter. I fed it with 1 cup scant spelt flour instead of the usual unbleached all-purpose flour and half cup of water. But it did not activate as usual. See bottles below. The three layers of fluid level indicate these babies are still hungry. Or perhaps hangry because they won’t budge to my stirring. 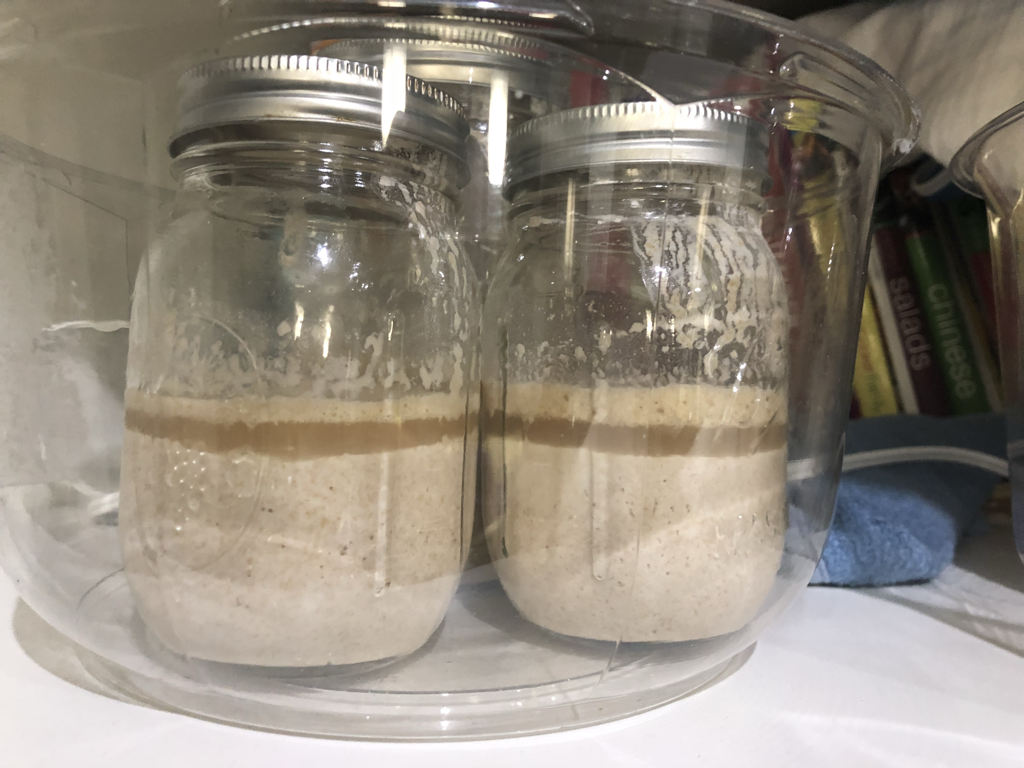 So I experimented with different feeds to see whether the spelt is truly the culprit and to see what would satiate their hunger... and the winner is 3/4 unbleached all-purpose flour and 1/4 spelt, vs. 1/2 unbleached apf and 1/2 spelt (came second), vs 3/4 spelt and 1/4 unbleached apf. Lean is mean. Looks like, spelt made my baby Doughy hungry... Now the ultimate test whether this spelt-laden sourdough starter would work was to make a dough and put it in the refrigerator for overnight fermentation. 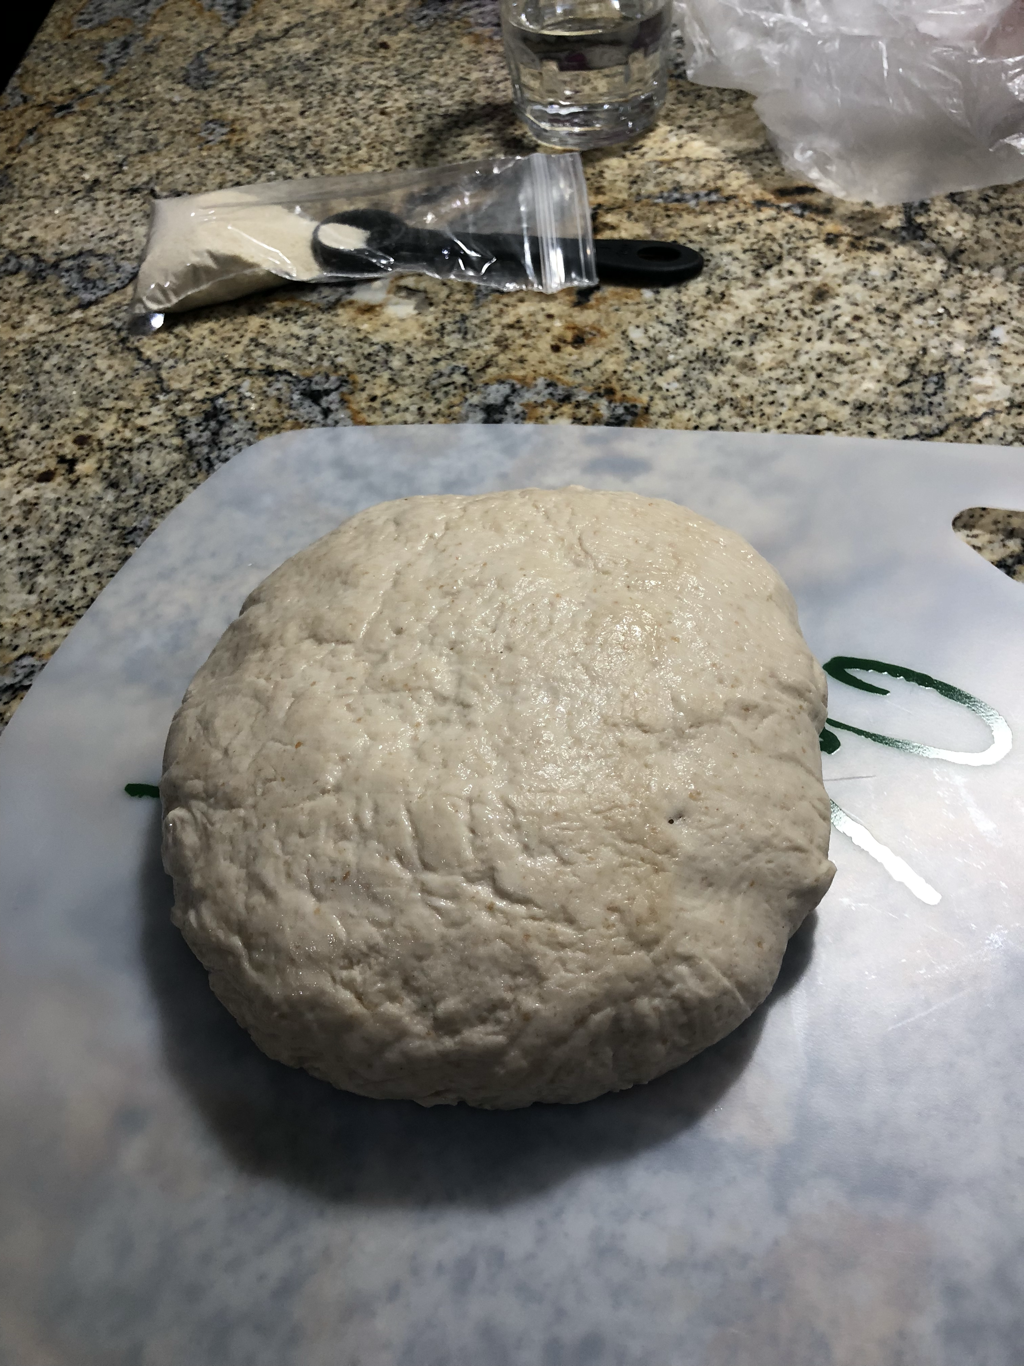 When I checked on my refrigerated doughs, I was surprised to see depressed doughies. With all-purpose flour feed, they are usually happily lifted the next day. So I dusted their middles with 1 tsp of dehydrated starter. Let’s see if that will jumpstart these kiddos. After folding and unraveling their tight and air-free matrix, and giving them a cardiac-massage-like kneading, the baby doughies felt more cushiony but I knew they still need some aeration. Had to put them in a warmer place so my dehydrated starter can activate these cold-hearted doughies. 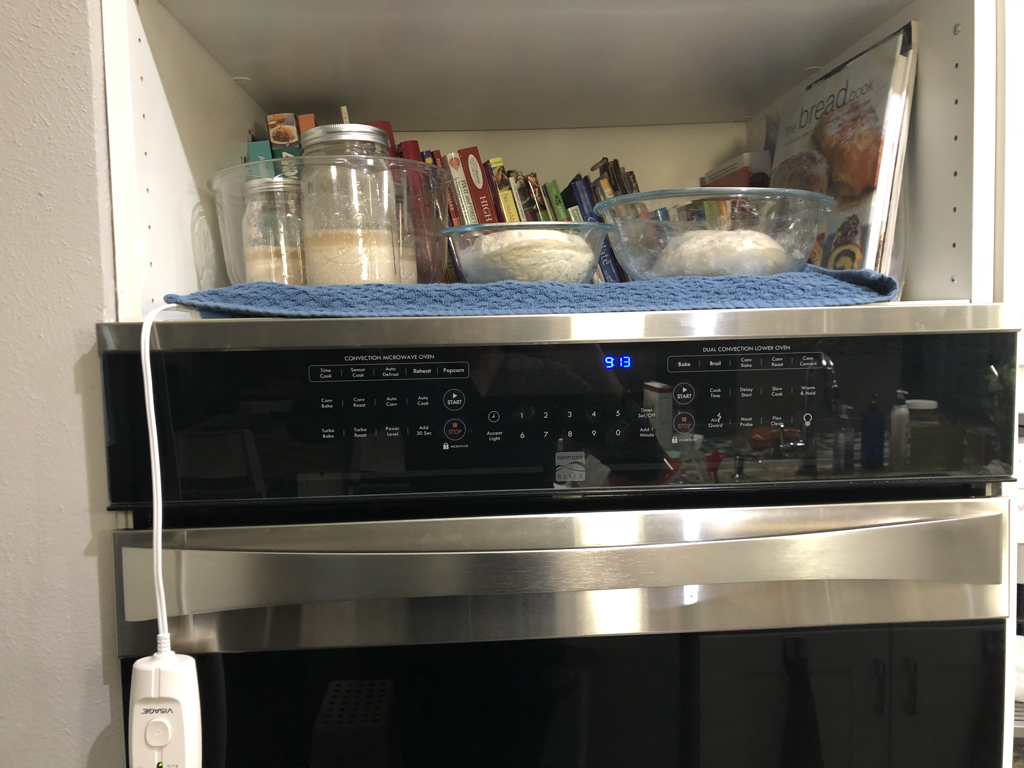 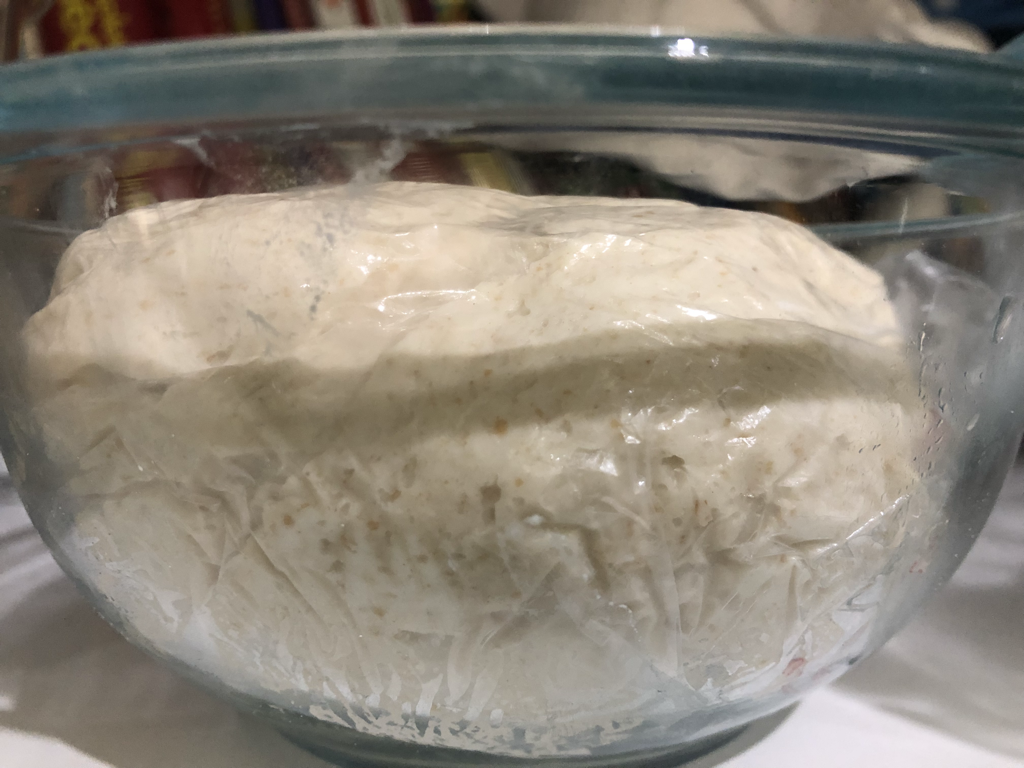 Photo above is now showing some bubbly activity. Glad I didn’t have to call Baker 911... yet. And the dehydrated starter kicked the dough back to life! This baby’s about to jump off the bowl. lol! 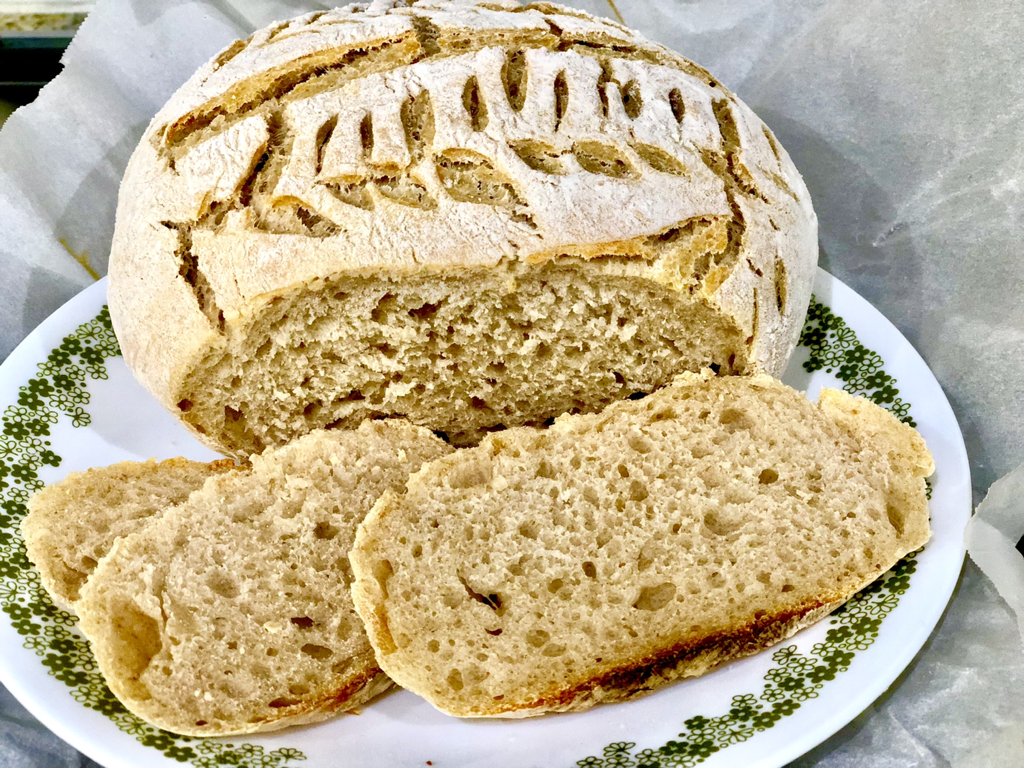 Success at resuscitating the sour dough starter!
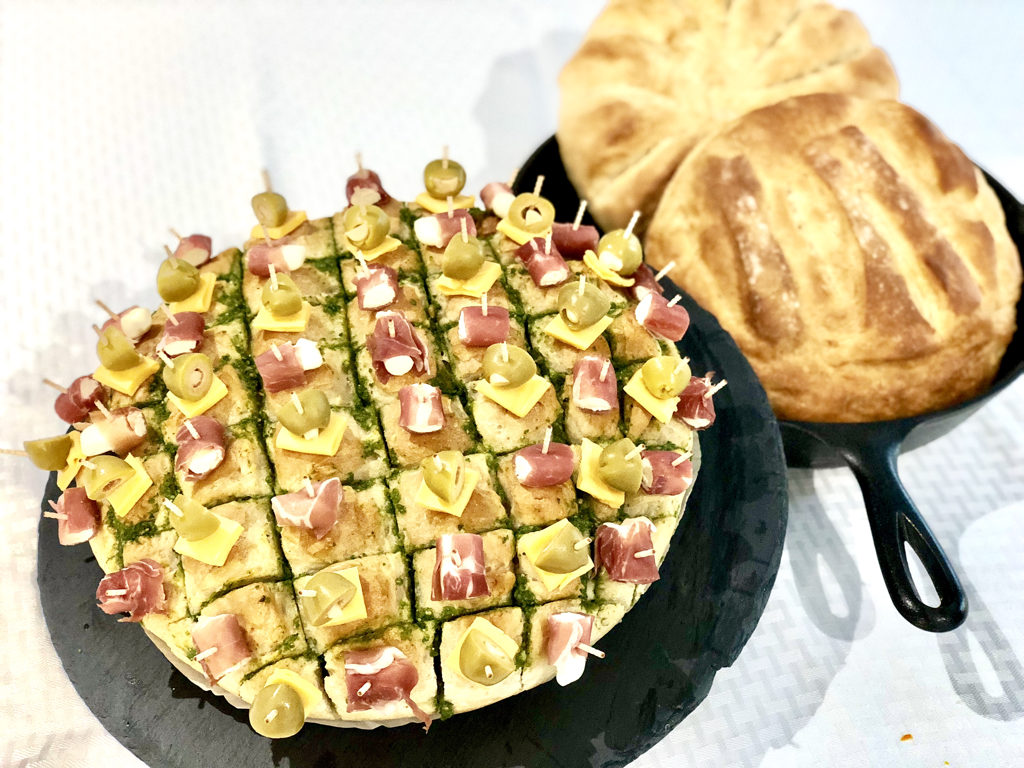
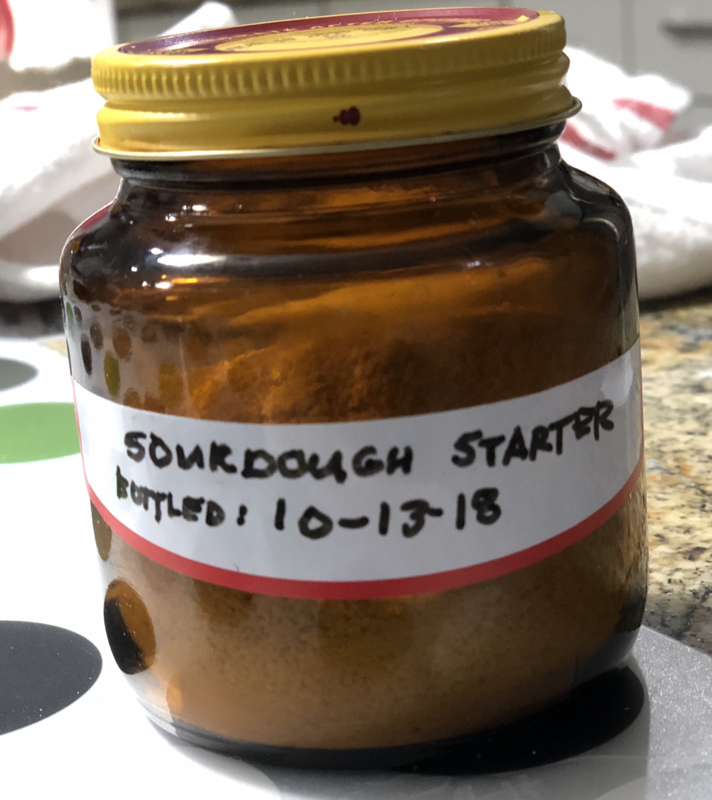
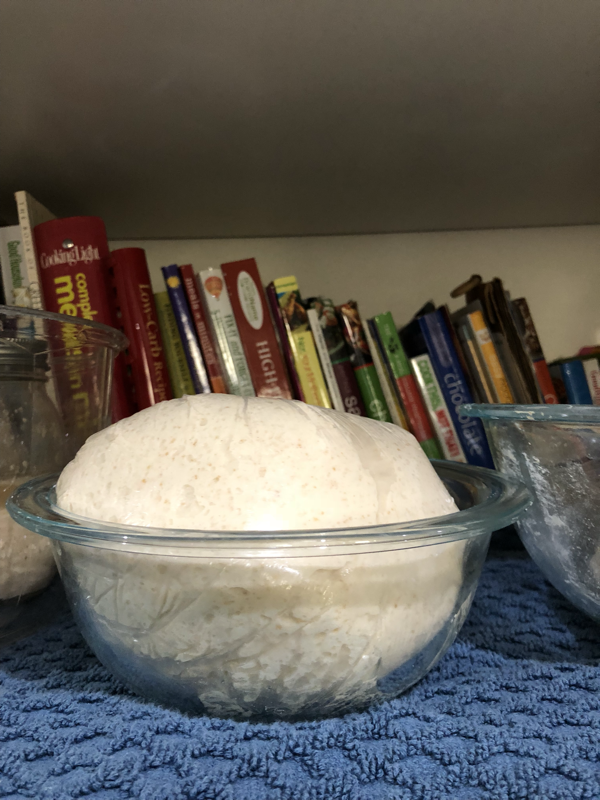
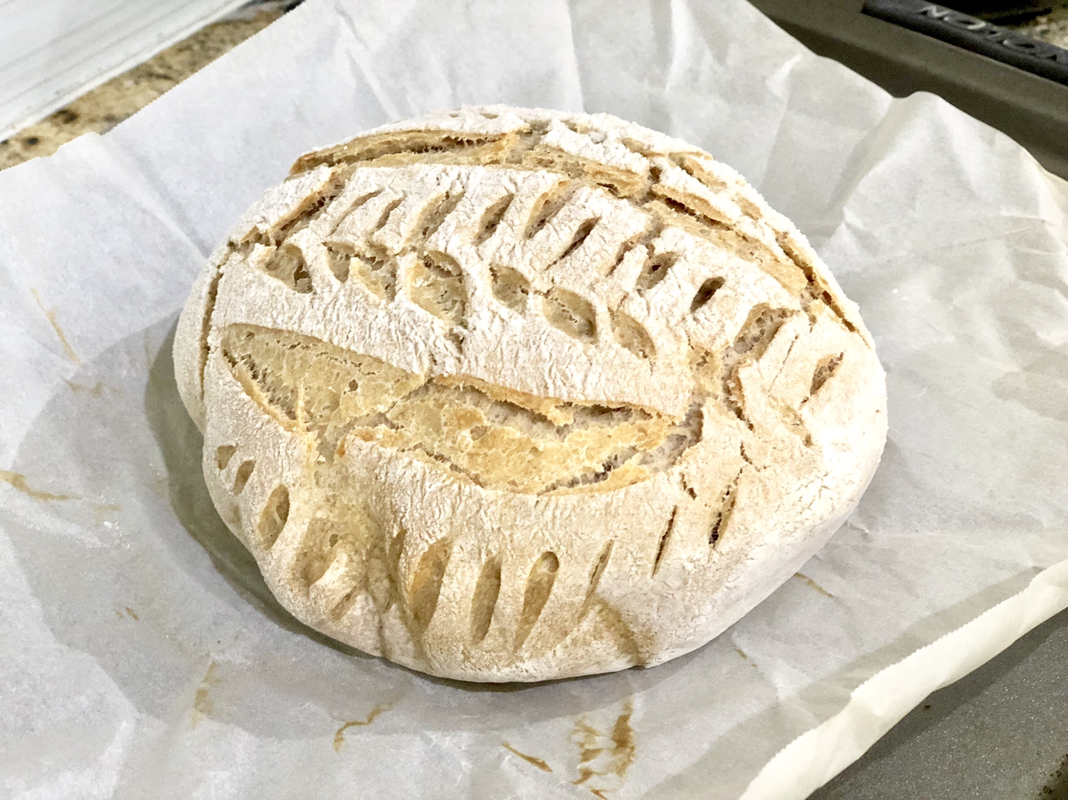
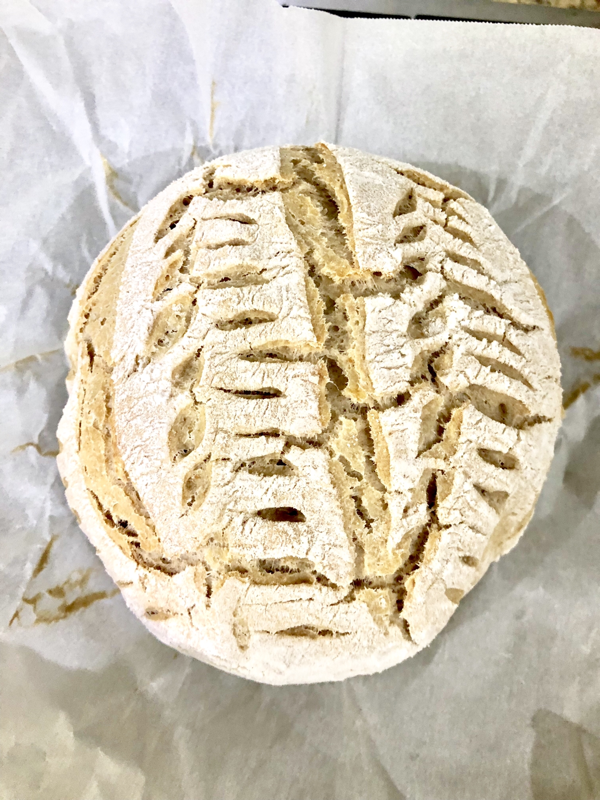
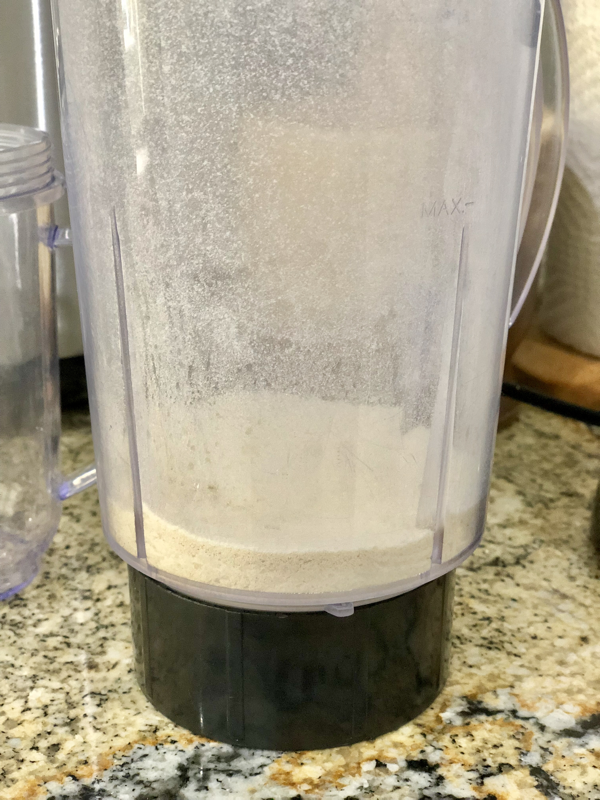
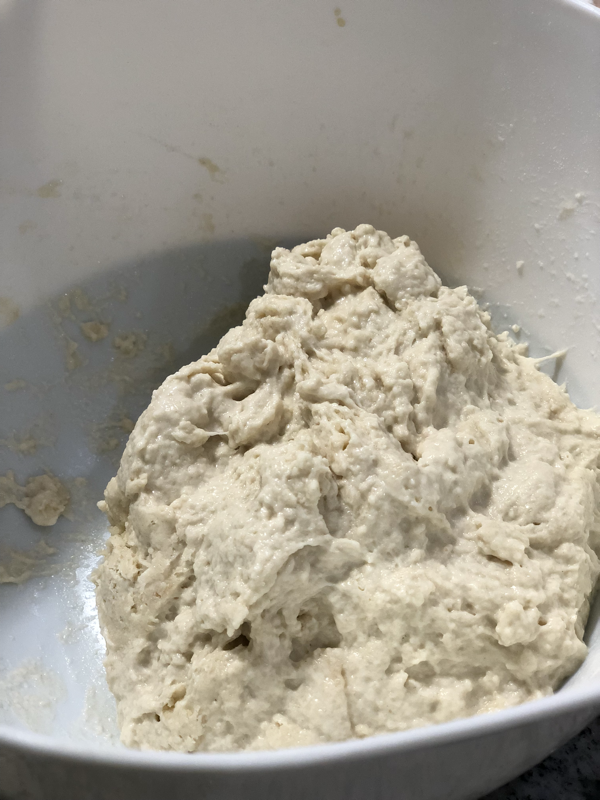
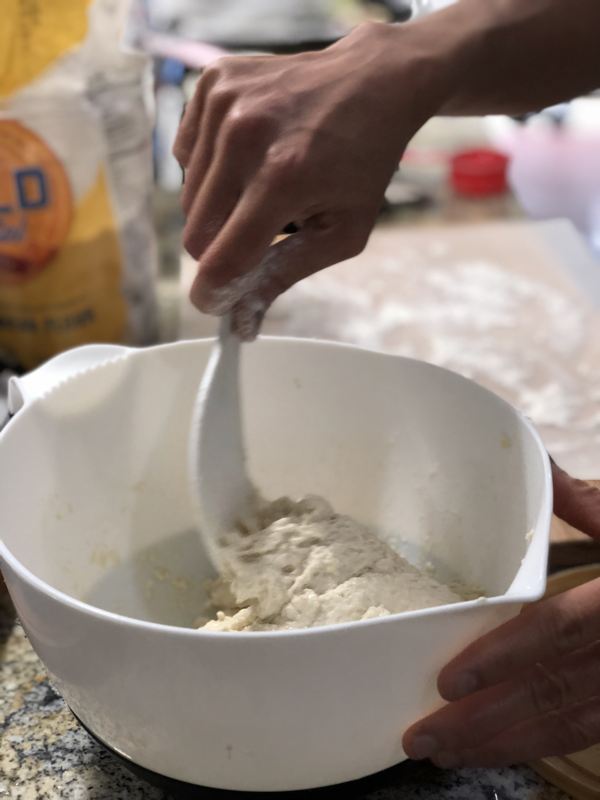
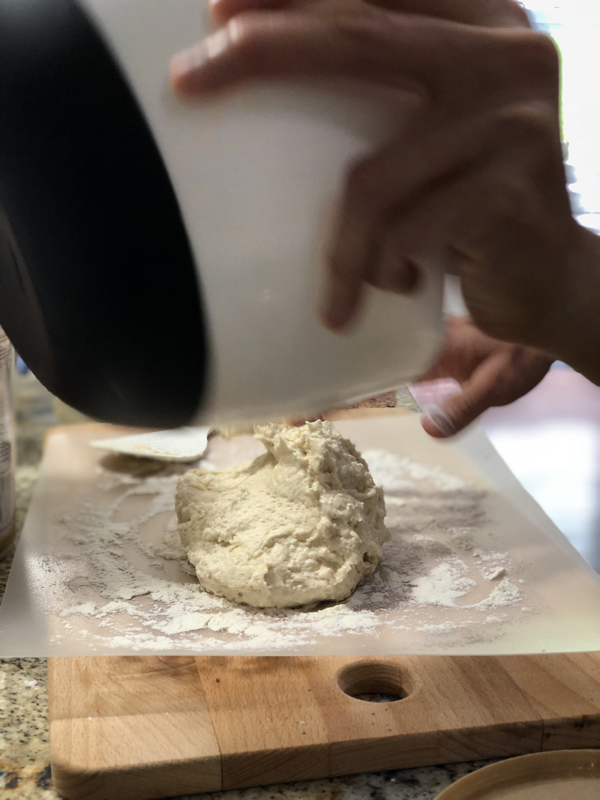
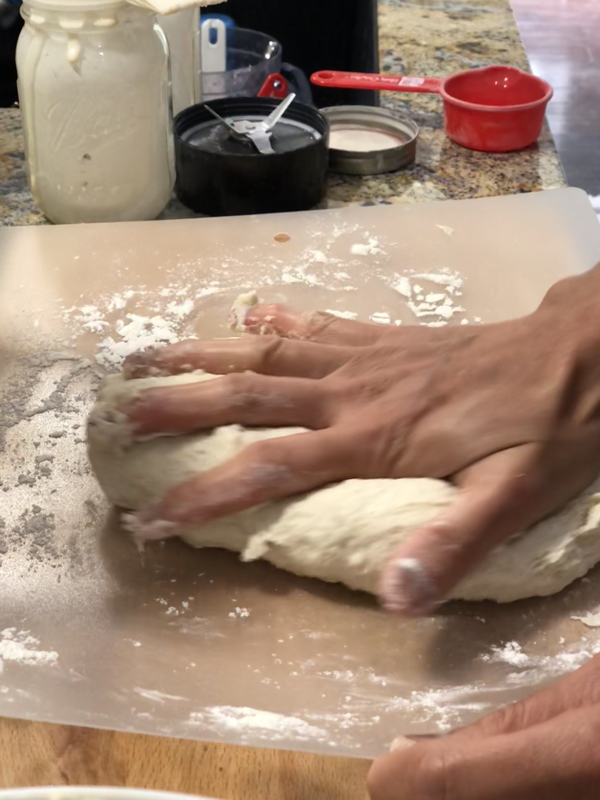
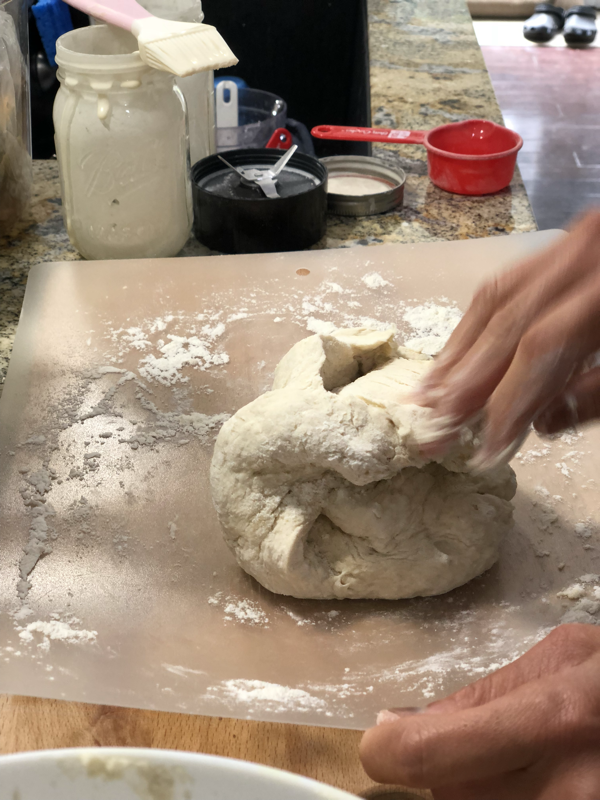
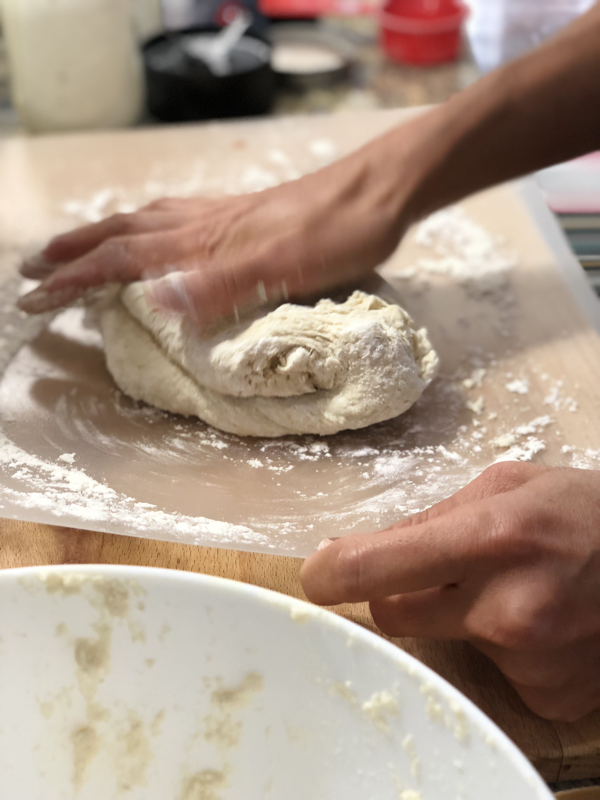
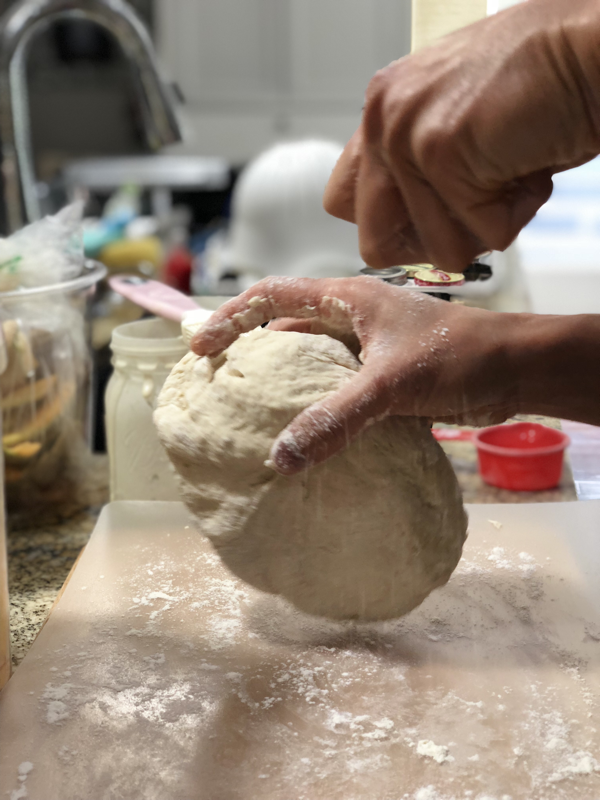
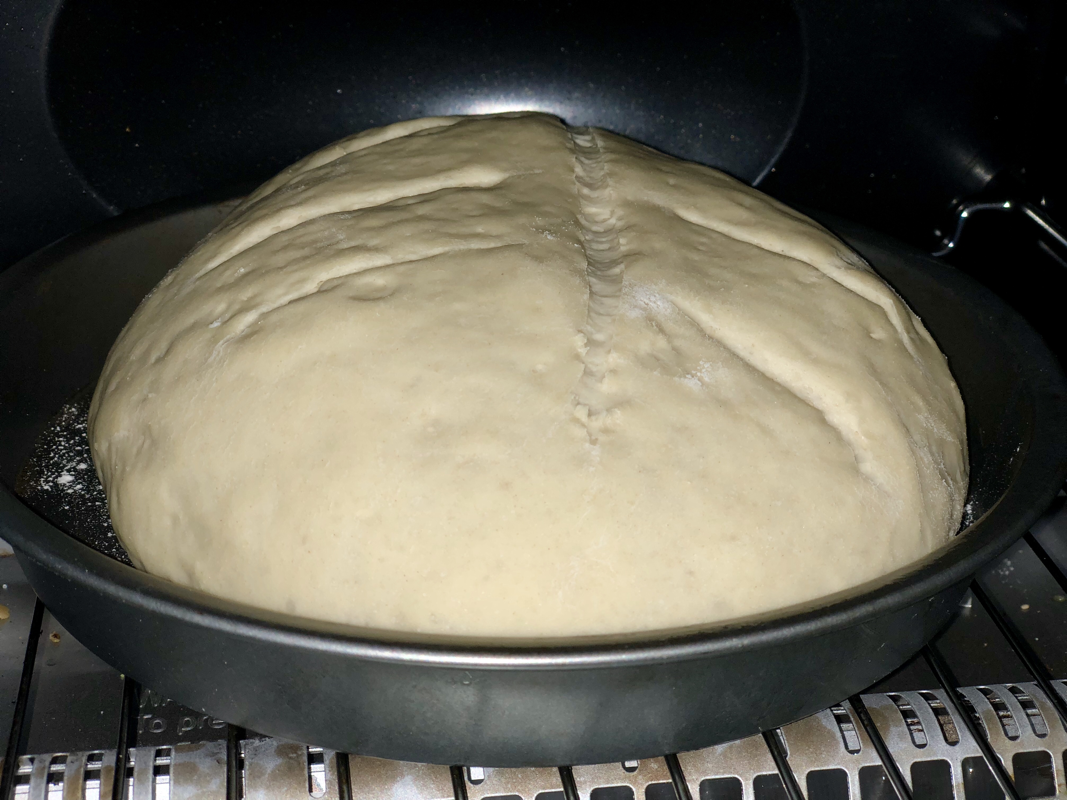
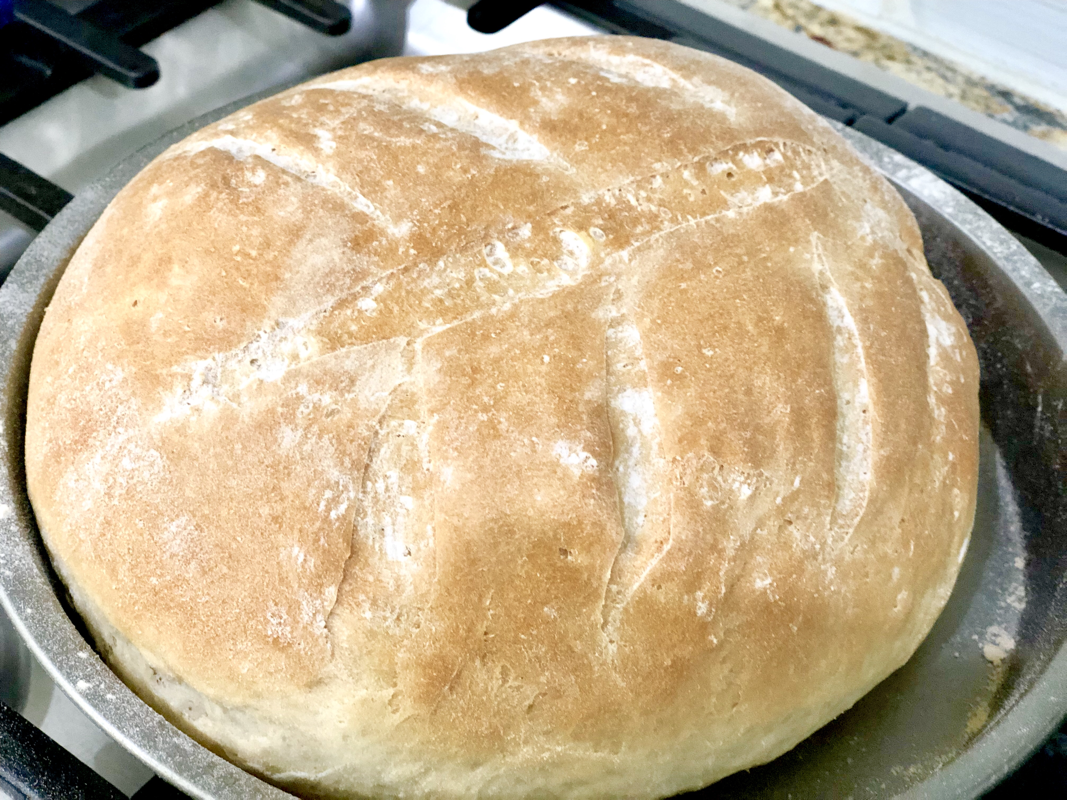
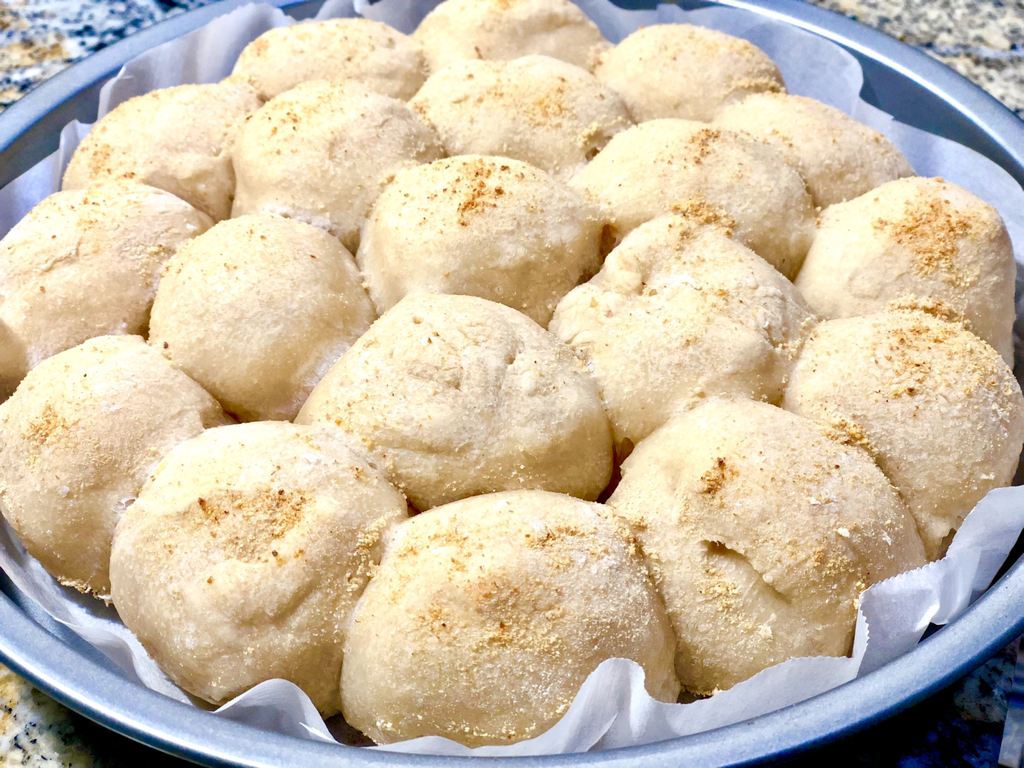 In the Philippines, where I was born and raised, pandesal or saltine bread is a local favorite. Instead of dinner rolls, we prefer breakfast buns because lunch and dinner are meant to be eaten with rice, the staple carbohydrate source, much like potatoes and bread in the other regions of the world. When we moved to the east coast, I missed this food so much. I spent the first few months in the kitchen baking these wonderful buns, and had quite a success. Now that I discovered sourdough bread, I thought, why not combine the health benefits of sourdough with the yummy-goodness of hot pandesal. After a couple of trial and error, I was finally satisfied with this new take on pandesal. Let me call this the pandesour pullout bread or sourdough pandesal. It’s very easy to make. I used the same dough recipe that I had for sourdough bread with some modifications in the ingredients. I included measurements in grams for accuracy and also some alternative options. SOFT BREAD RECIPE: 1 1/3 cup (245 gm) well-fed and bubbly sourdough starter 1/4 cup + 3 tbsp (105 gm) water 1 tbsp (15 gm) canola oil 1 tsp (5 gm) salt 1 tsp (5 gm) maple syrup or sugar 1 2/3 cup (245 gm) bread flour (for softer crumb) or all-purpose flour (for cheaper alternative) 1) Pre-heat oven to 375F. 2) Combine all ingredients and knead for 10-15 minutes. 3) Shape into one big round dough and place in a bowl. Cover with an oiled cling-wrap. Refrigerate overnight. 4) Take out from refrigerator and form dough into small round balls. If you want more uniform shapes, feel free to use a cookie cutter, or alternatively, roll the dough into a log and cut into 1-inch size. 5) Put the rounded doughs in a baking pan or Dutch oven. Let rise until these double in size. 6) Sprinkle with plain bread crumbs before baking in the oven for 35-45 minutes, depending on how brown you want the crust to appear. Don’t forget this last step in the process (sprinkling on bread crumbs) because that’s how this bread can make its claim as a pandesal. Without it, it’s just plain old breakfast bun or dinner roll. It’ll have some identity crisis of sorts (as though it hasn’t had one already, being a sourdough bread and pandesal rolled in one). 7) If using a Dutch oven, keep the lid on to keep the crust soft. If using a baking pan, put another pan at the bottom of the oven and pour water for steaming. For those who want an even softer and more sour crumb, you may substitute water with kefir milk. Research shows that kefir milk prolongs shelf life of sourdough bread. You may need to adjust flour and water depending on the consistency of your kefir milk. Let me know how your kitchen experiment turns out! Post your comments below.  After the weekend of college move-in, we came to a quiet home. No more firstborn daughter who incessantly sings and plays musical instruments. Sigh. My pets were hibernating in the refrigerator for this anticipated weekend travel. So I told my husband, “Let’s have the regular bread for tomorrow because Baby Doughy will require some hours to activate.” It was late in the evening and a miracle that we were even home considering the flight delays and the cancellation of our original flight. Thank heavens for my well-travelled husband who knows the drill when it comes to these kinds of airport mishaps. We were able to get into another flight and safely home, without our luggages. “It’s the last thing we needed anyway and probably the only time when we don’t welcome having those luggages home,” my husband said. True. Those four luggages contained all of my firstborn’s things for college, and contained nothing but laundry and empty space on the way back home. I definitely don’t miss the dirty clothes. So back to my empty bread basket. What a surprise to hear my husband say, “Oh, no. I won’t eat anything other than sourdough bread. I’ll wait it out.” I did a double take and stared at him. Did he really say that? He smiled. “I’m now a sourdough snob.” I took out the two mason jars of sourdough starters from the refrigerator and started feeding the babies. Wake up! Daddy misses you. Of course, I overfed them again and ended up with six bubbly jars the next day. I must have missed them too because I got creative this time. I bought some prosciutto and olives, made a pesto sauce and decorated the largest bread to make her look like a diva. O, diva! Isn’t she lovely? I think I may have awakened the sourdough monster within me. After this, I don’t think I‘ll be able to settle for plain, old sourdough bread again without getting creative every now and then. Sourdough makeover, here we go!  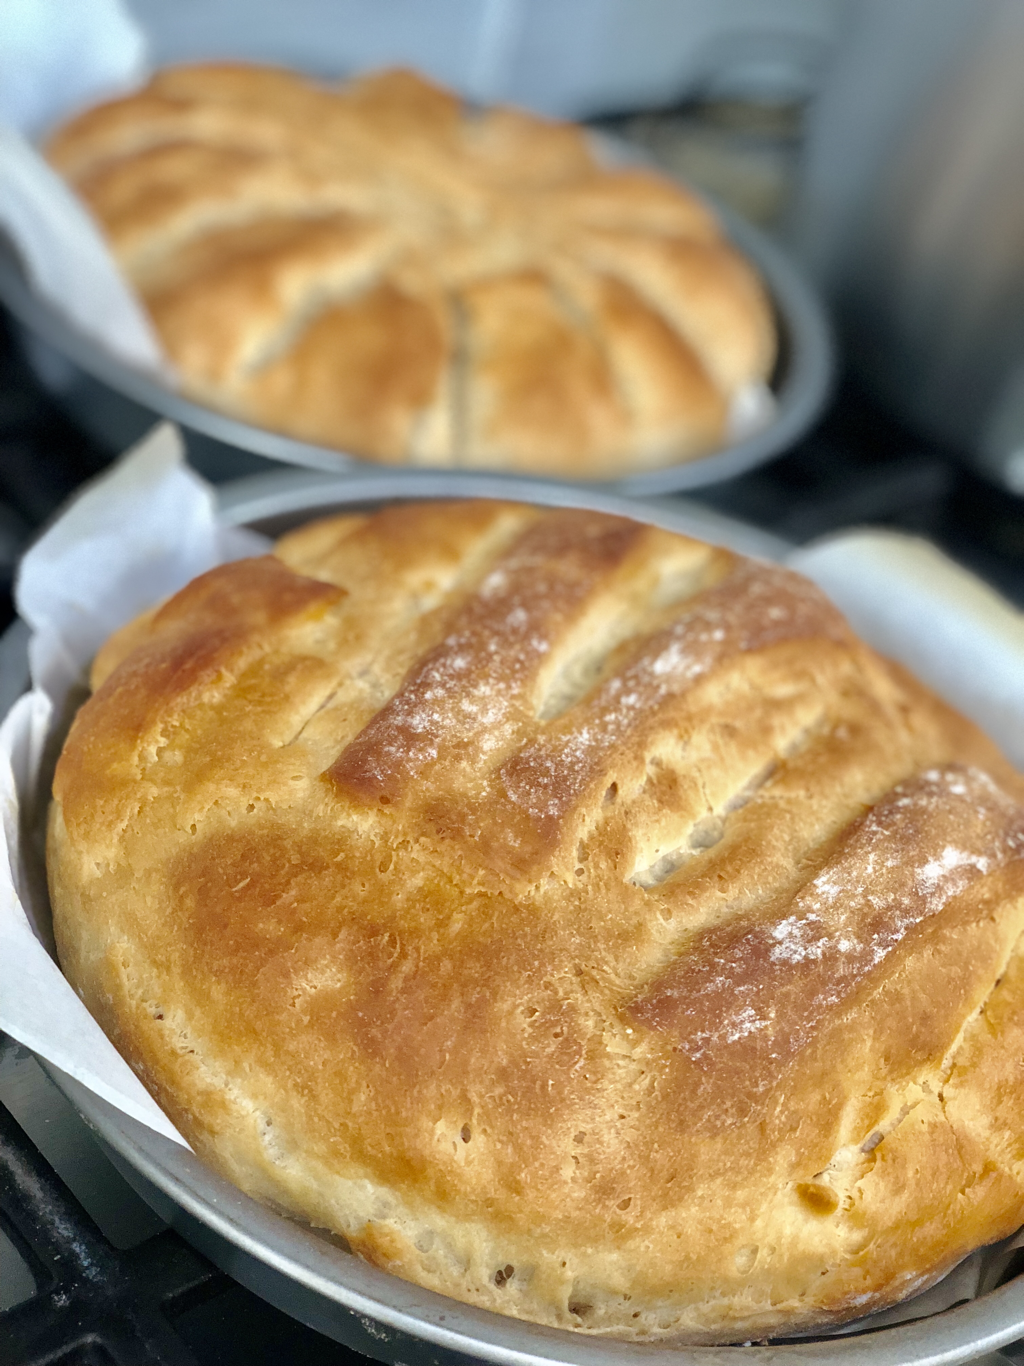  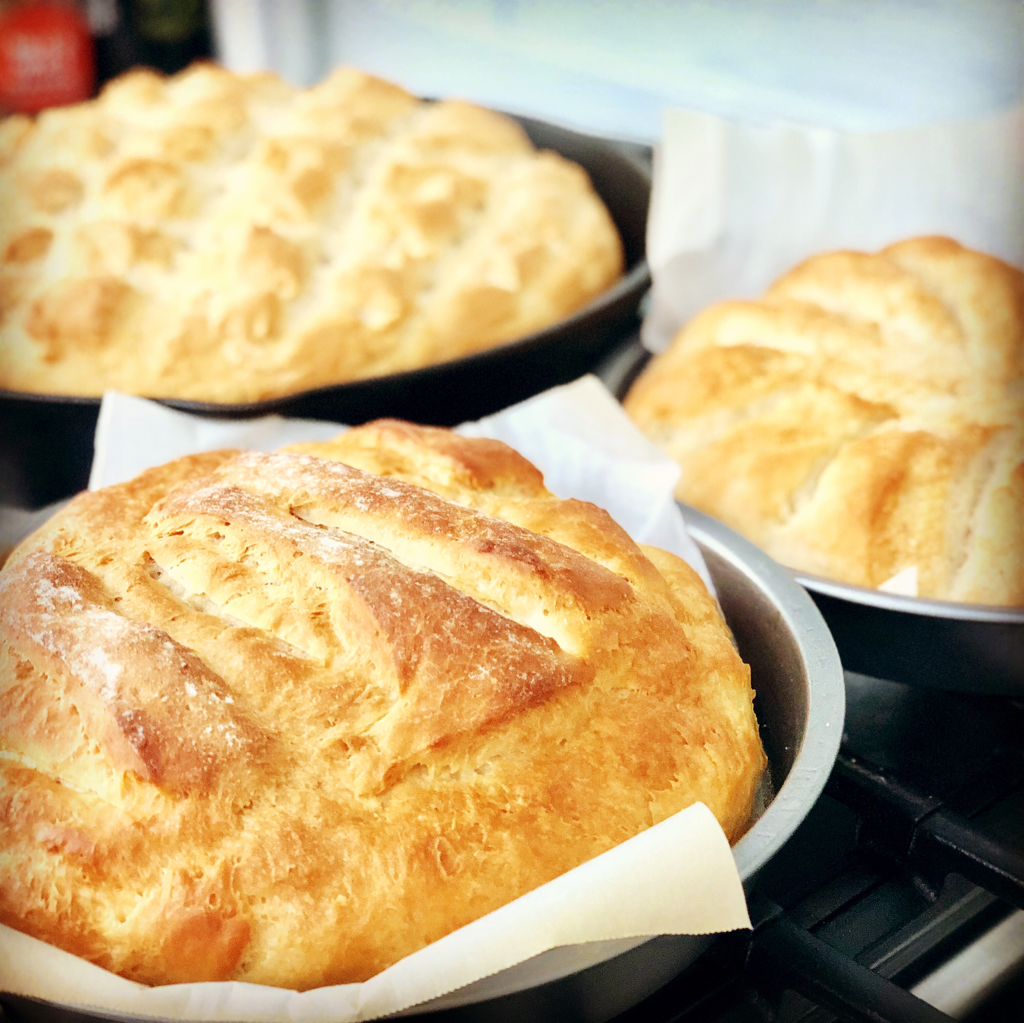 HOW TO DEHYDRATE SOURDOUGH STARTER: If you’re a cheapskate like me who doesn’t want to throw away any of her sourdough starter, but doesn’t want to end up with tons of mason jars of starters idly lying around waiting to be fed, you’d consider dehydrating those babies and putting them to sleep. I was an anesthesiologist in my other life so putting someone to sleep and making sure they wake up is engraved in my DNA. 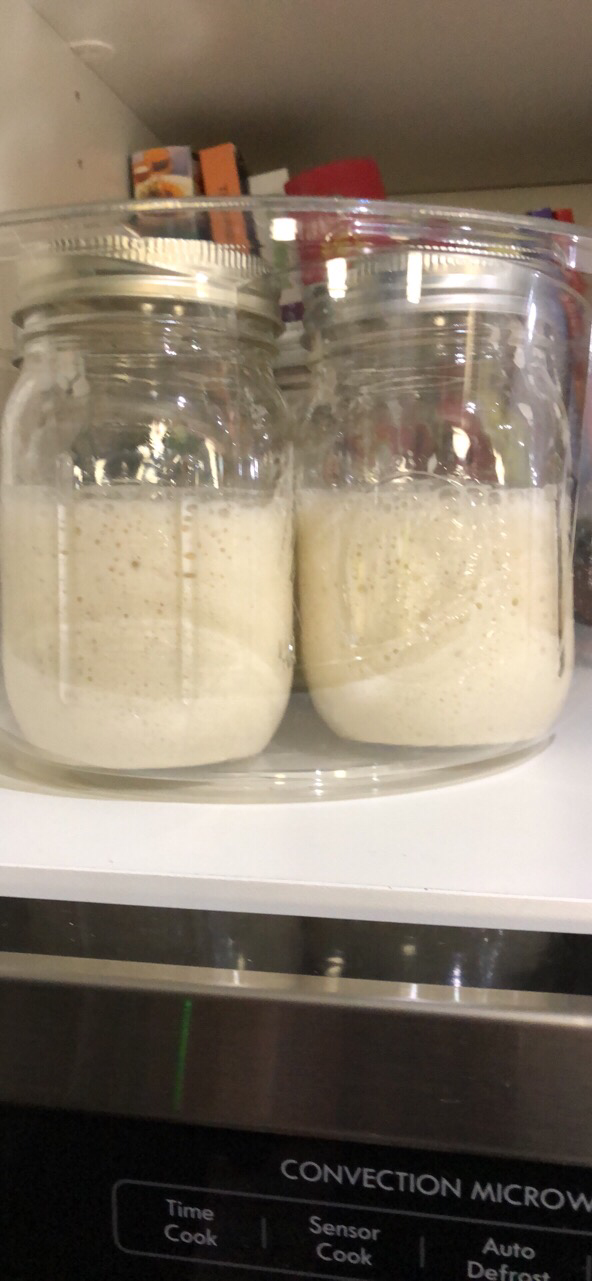 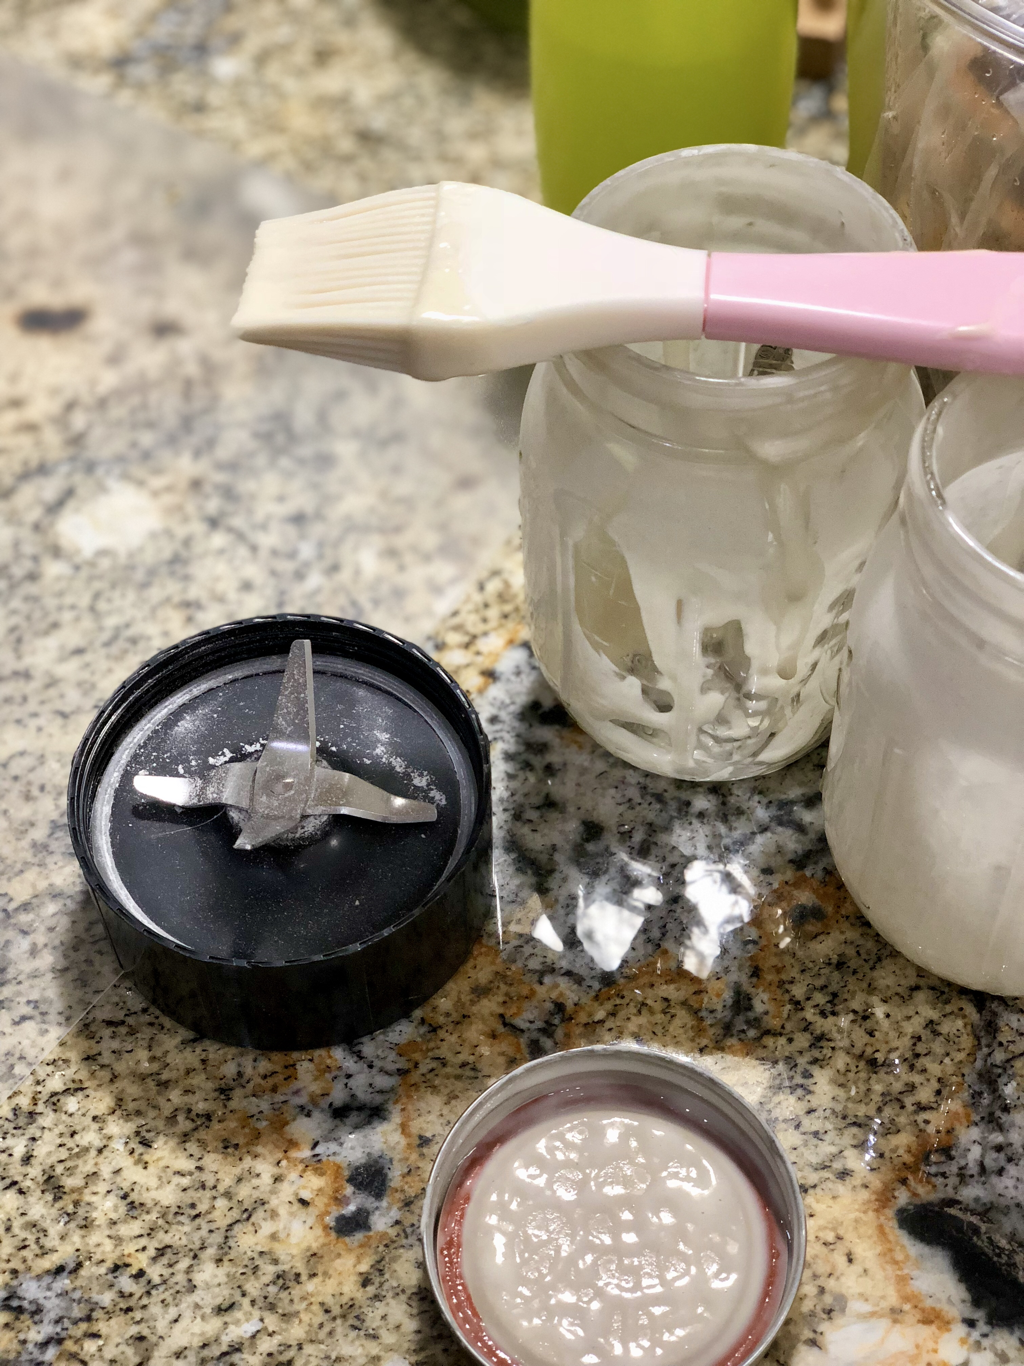 You’d need a well-fed sourdough starter like the one on the top photo, a baking brush, and a palette to paint your starter on (I use the thin, transparent chopping board; thicker ones don’t work well. Some use wax paper). 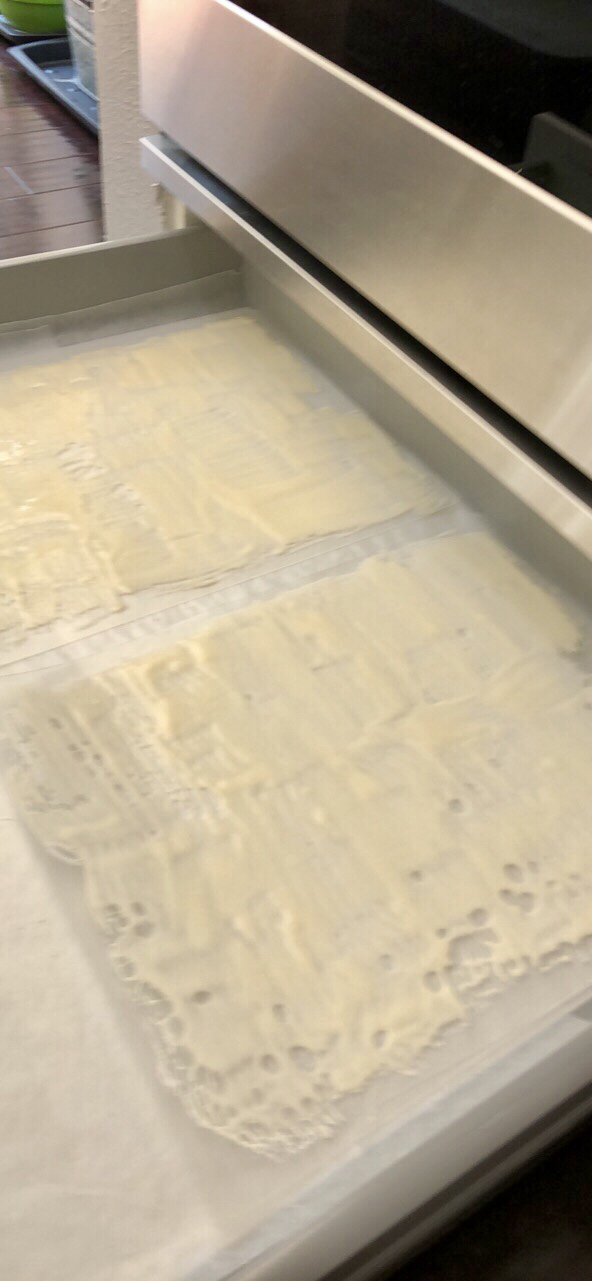 You don’t need to be an artist to produce these neat brush strokes of sourdough starter on your palette. Seriously, those are rough strokes. I have to confess, I am also a painter. The consistency of sourdough is somewhat like acrylic paint so make thin swift strokes with your wrist. Put your palette in a dry place. I put mine in the proofing drawer. I never knew I had one until my daughter pointed out to me. When I have more than two palettes, I leave the rest on top of the gas burner (with the burners off!) and they dry faster than the ones in the drawer. Just make sure you don’t have spiders and other critters that would leave their footprints on your masterpiece. 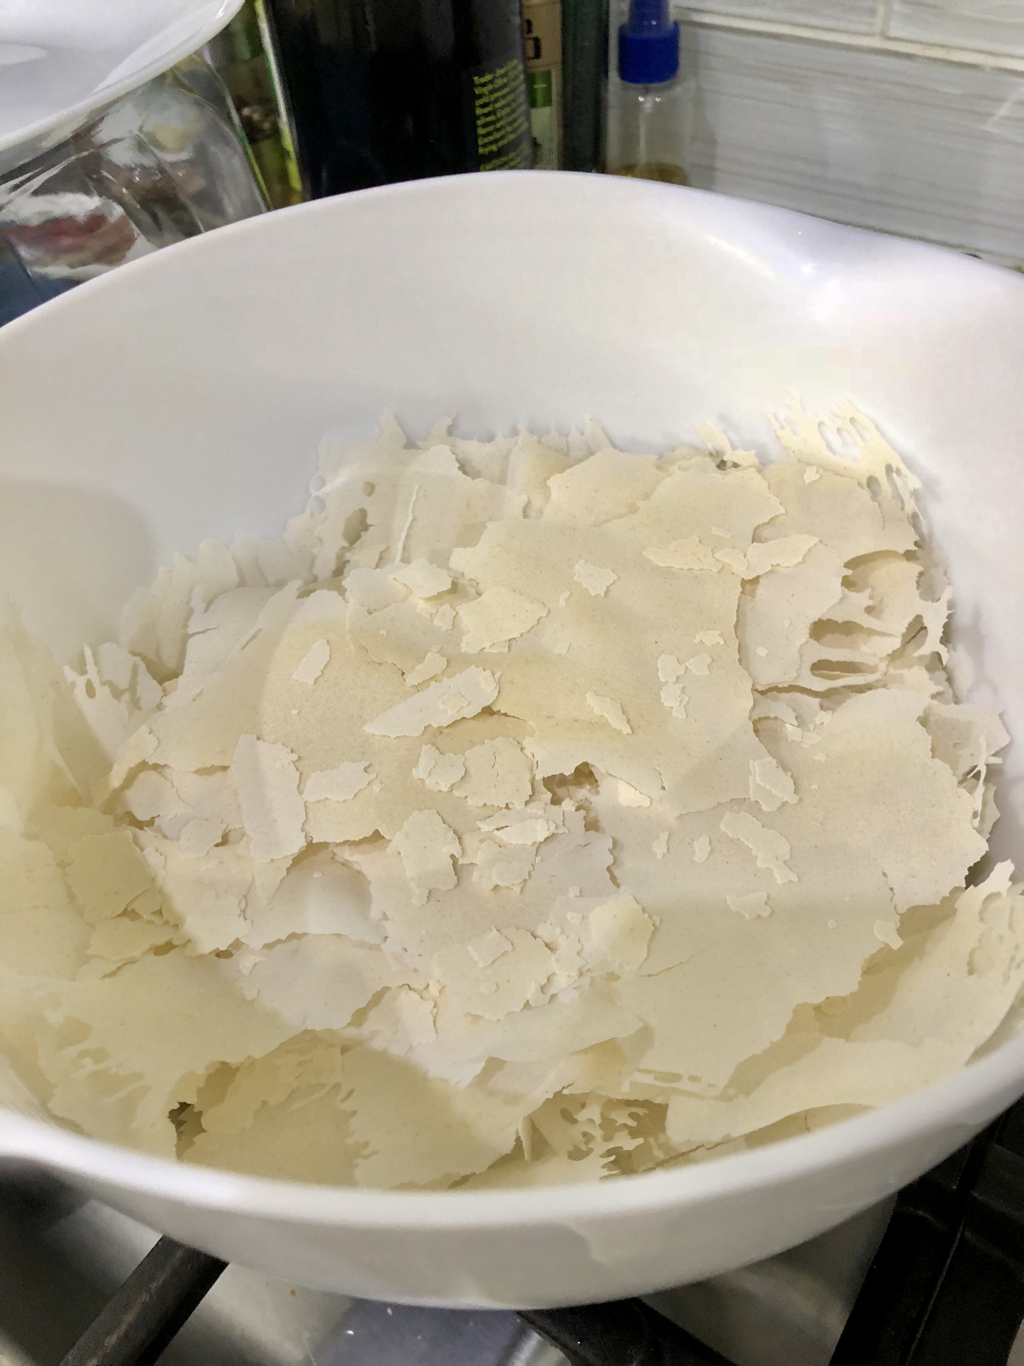 Once they dry, they separate themselves from the palette. I transfer them in any container ready to be pulverized. Some don’t do this and leave the dehydrated flakes as is. I found it easier to activate and incorporate with water when it’s in powder form. 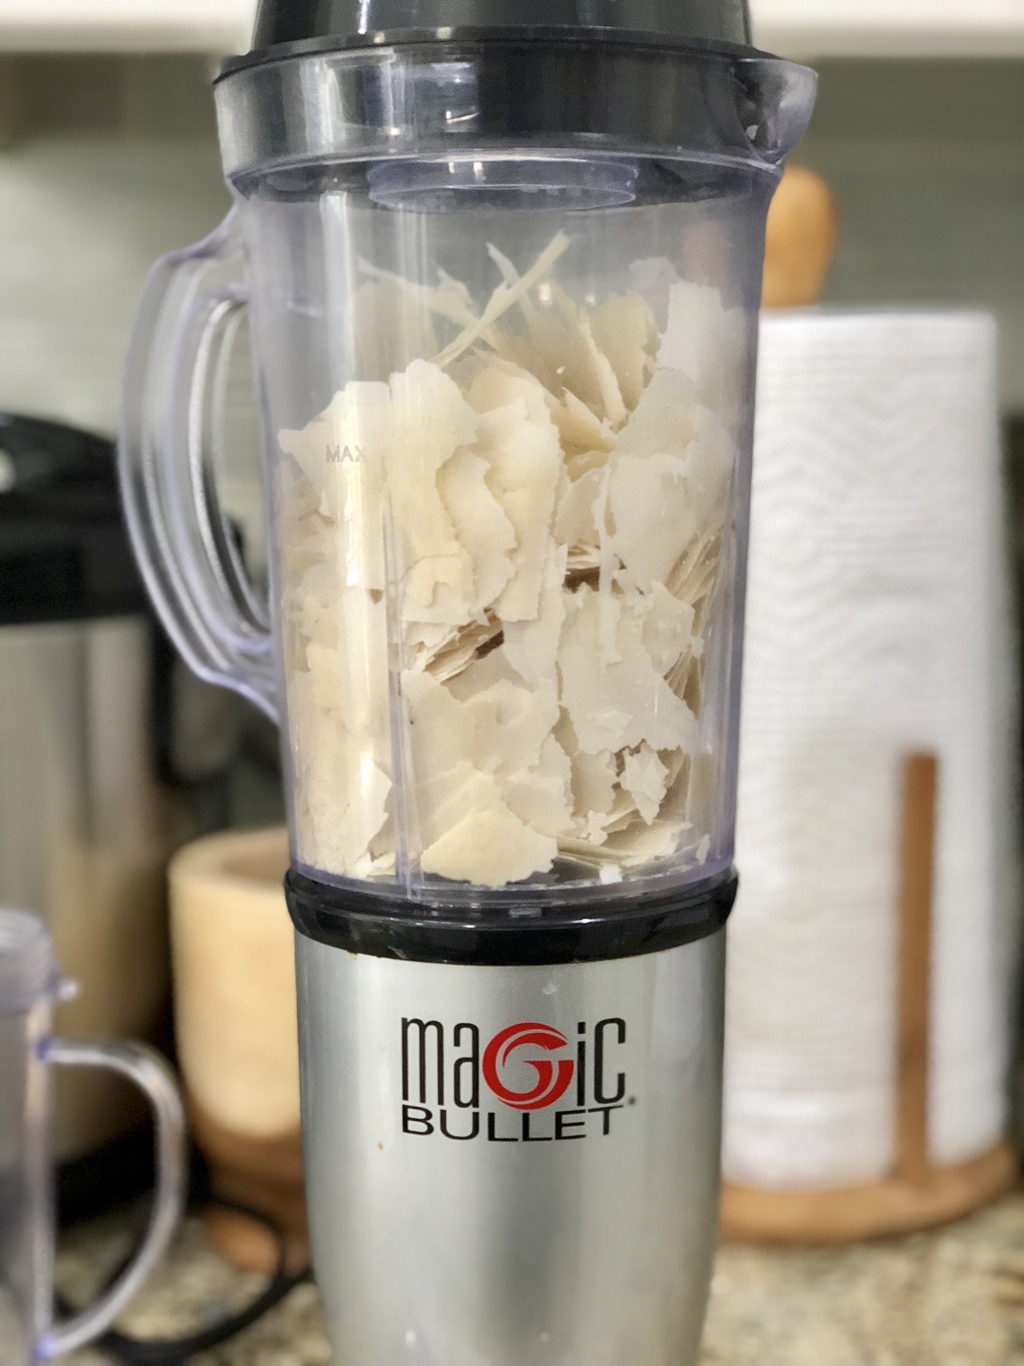 So I use my ever reliable 10-year-old blender to pulverize these kiddos. Tilting and shaking the container makes the process faster. And then you’re ready to put the dry starters in ziplocks and tightly sealed containers to be stored indefinitely (as one blog claimed). I put a date on mine so I can track activation time. The photo below shows clear containers but I put these in opaque, light-proof cans and store in a cool, dry place like my pantry. 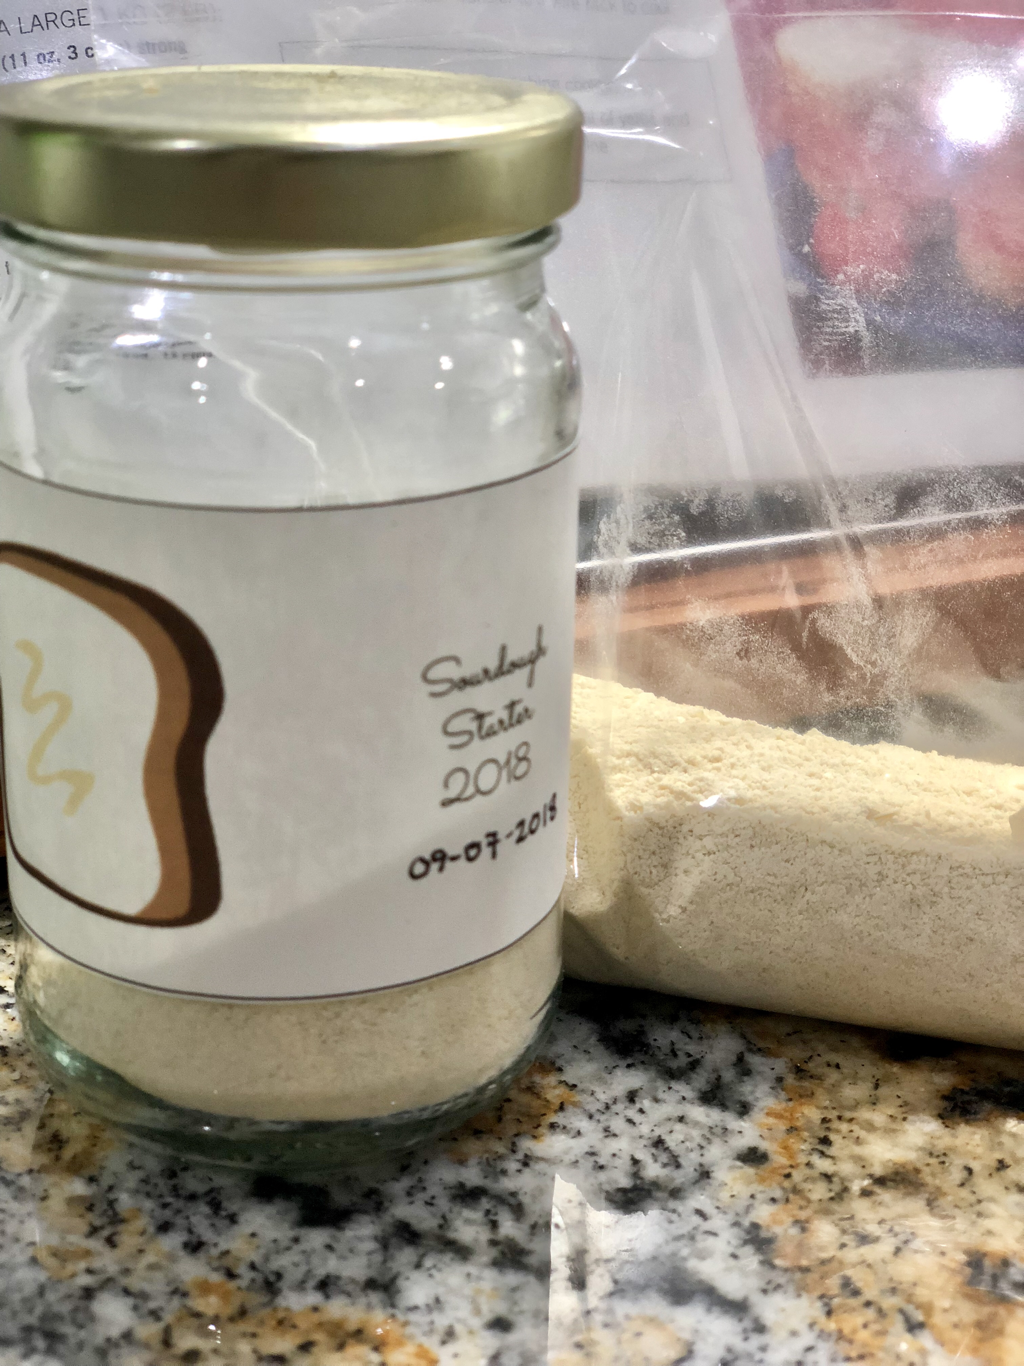 HOW TO ACTIVATE DEHYDRATE SOURDOUGH STARTER: 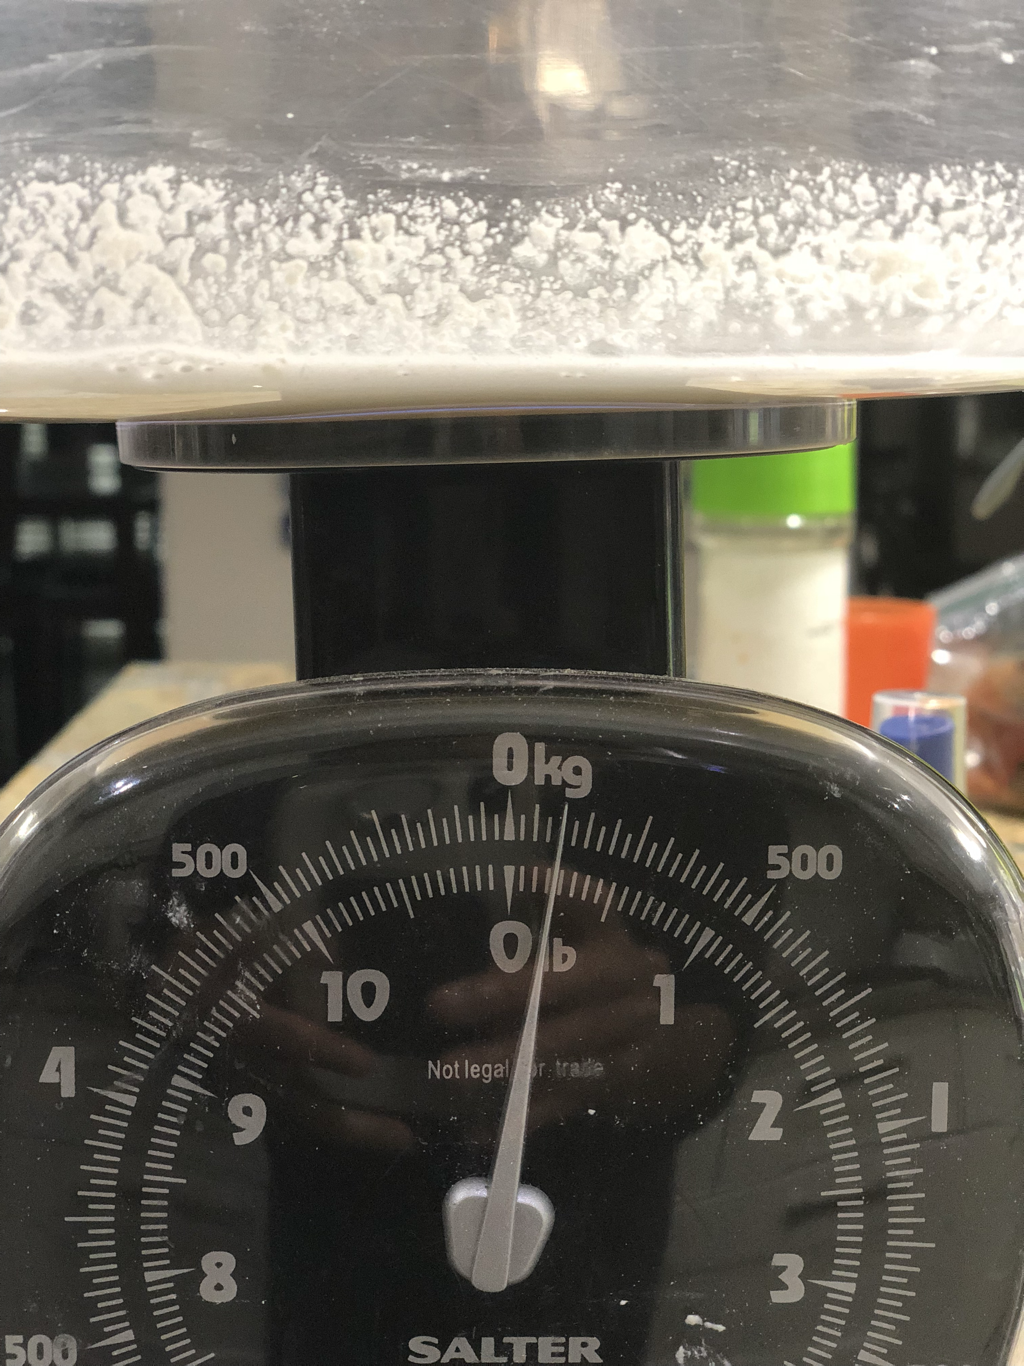 Once you’re ready to bake again, mix 2 tbsp of dehydrated sourdough in 1/4 cup warm water. Then add 1 cup flour and 1/2 warm water (feeding recipe) to the mixture. 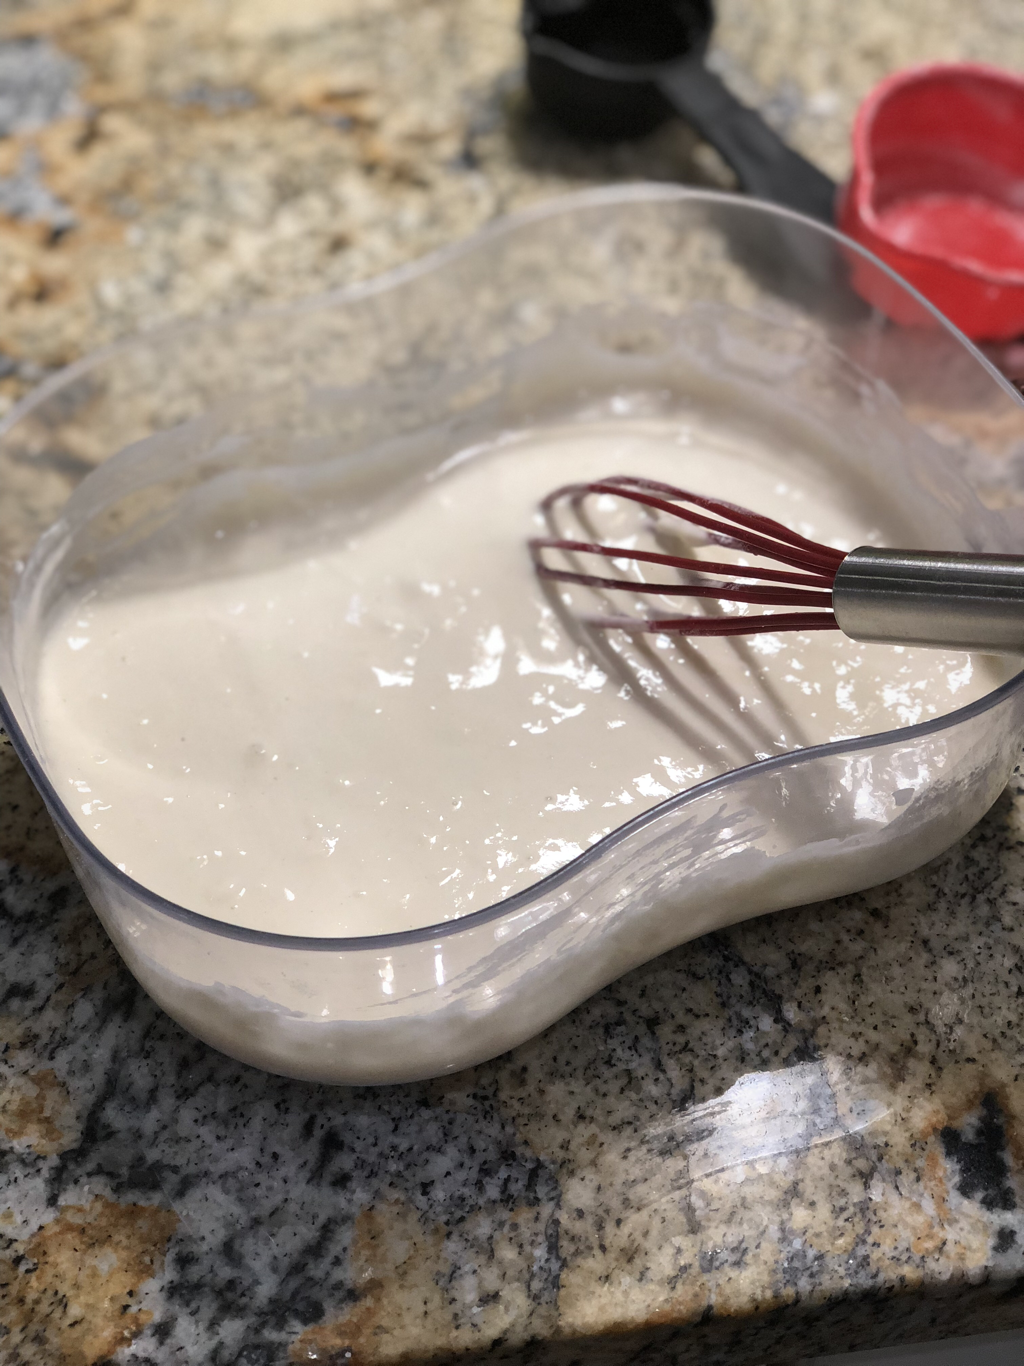 Pour into two mason jars. Make sure the lids are loose for air to escape. Then store in a warm place. I put mine on the shelf above the microwave/oven. These two jars can make a 1-lb bread. 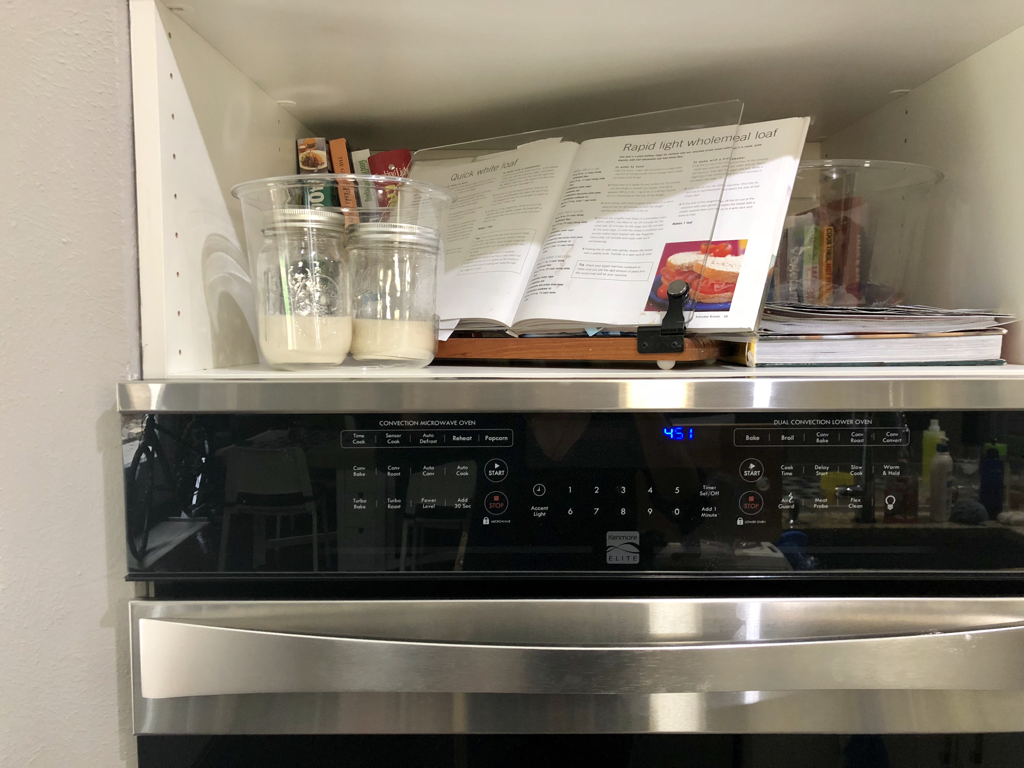 If you want more starters for future use, just measure out 4 oz of these well-fed bubbly babies and add more of the flour and water (feeding recipe ratio as above) and distribute to more mason jars. You should end up with 4-5 bottles in two days. Dehydrate some, refrigerate others, and give away the rest. Happy baking! 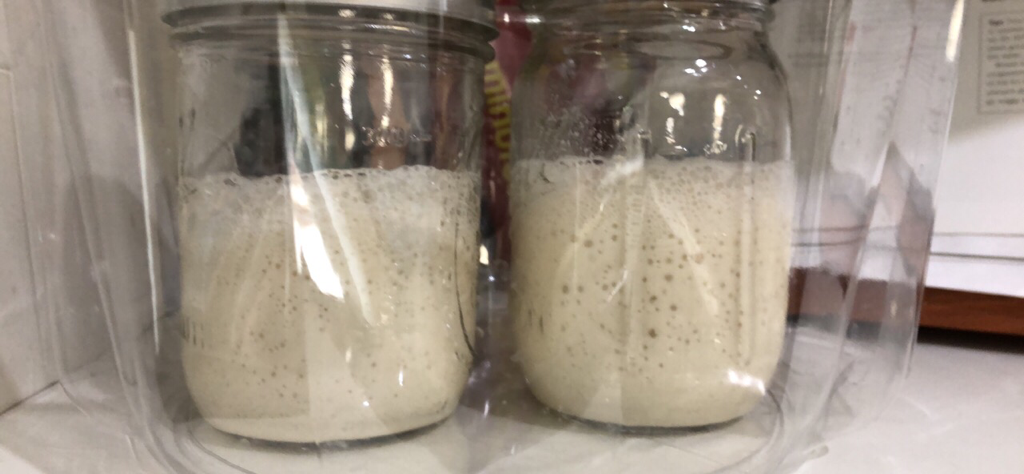 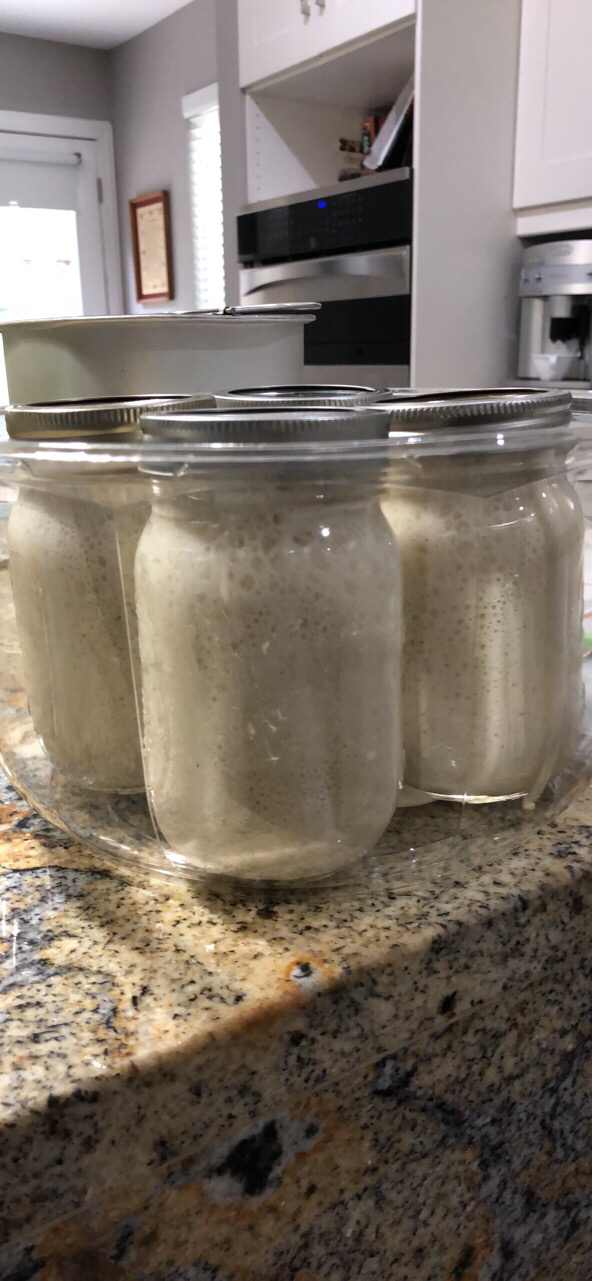 FIRST: Make sure you have enough well-fed sourdough starter. How do you know if they’re well-fed? They look bubbly and happy and about to break loose from their bottle cribs. TWO WAYS TO BAKE SOURDOUGH BREAD: 1) Bread Machine 2) Manual In my experience, there was nothing significant with using any of the above methods except time and effort. Choose what makes you fly! 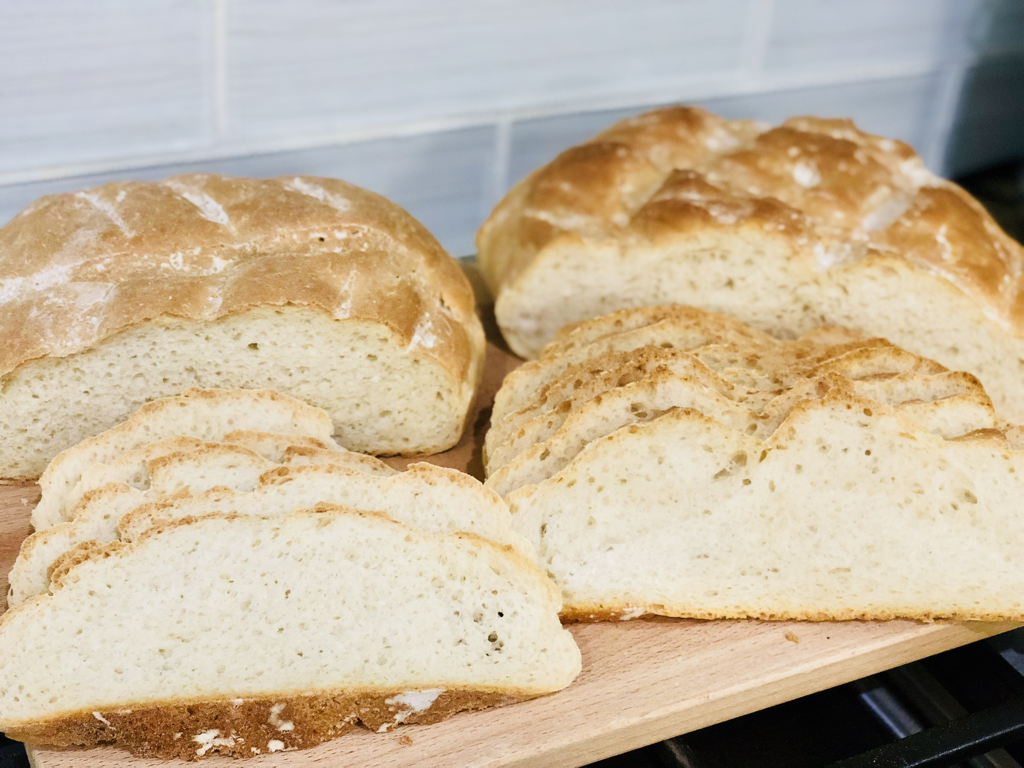 I prepared the one on the left by manually kneading the dough, while the one on the right was prepared with the aid of my bread machine, dough setting. HERE ARE THE INSTRUCTIONS: To make with a breadmaker Add the ingredients in the tin with the kneader in place. 1/4 cup and 3 tbps water 1 tbsp vegetable or canola oil 1 tsp iodized salt 1 tsp sugar or maple syrup 1 1/3 cup ripe (fed) sourdough starter 1 2/3 cup unbleached bread flour 1 tsp active dry yeast (may remove for denser bread: rising time may be longer) Set the bread machine on dough setting. Mine runs for one hour and thirty minutes. Once completed, transfer into a baking pan. Score the top of the risen dough with a sharp blade as desired and dust with flour (this step may also be done after rising). Let rise for 30 minutes. Bake in a pre-heated oven at 375F for 45 minutes. You may use a Dutch Oven and bake covered all throughout for a real soft crust or put water in a baking pan and stick it at the bottom rack. Others paint the top with egg white wash (water plus egg white). 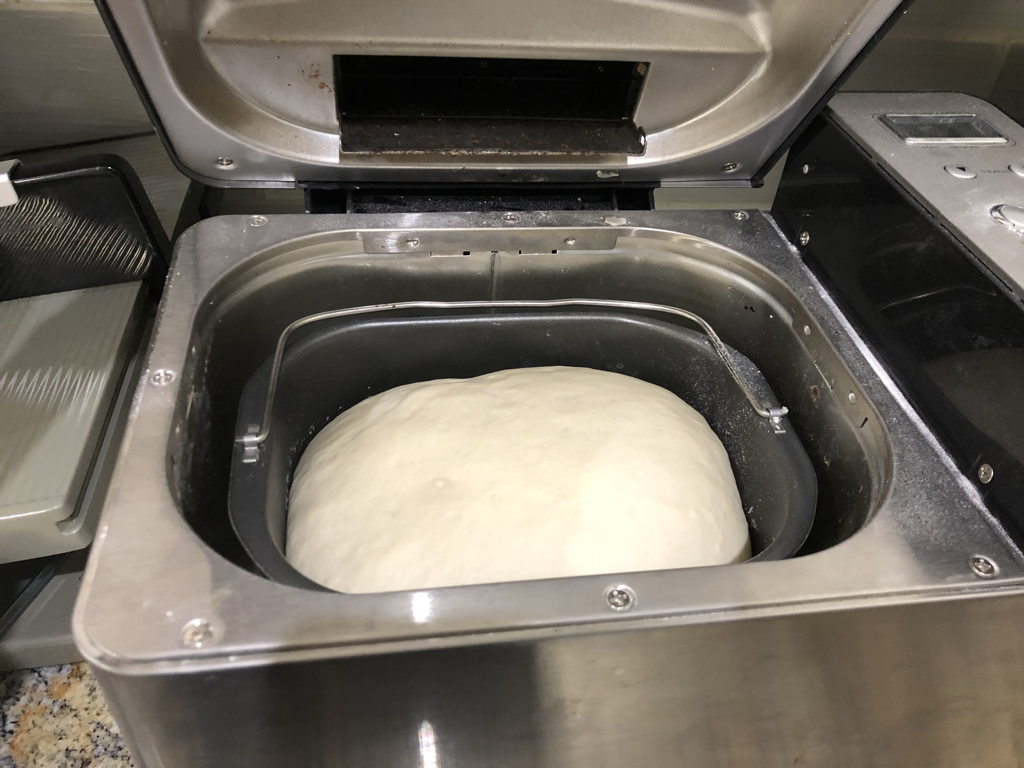 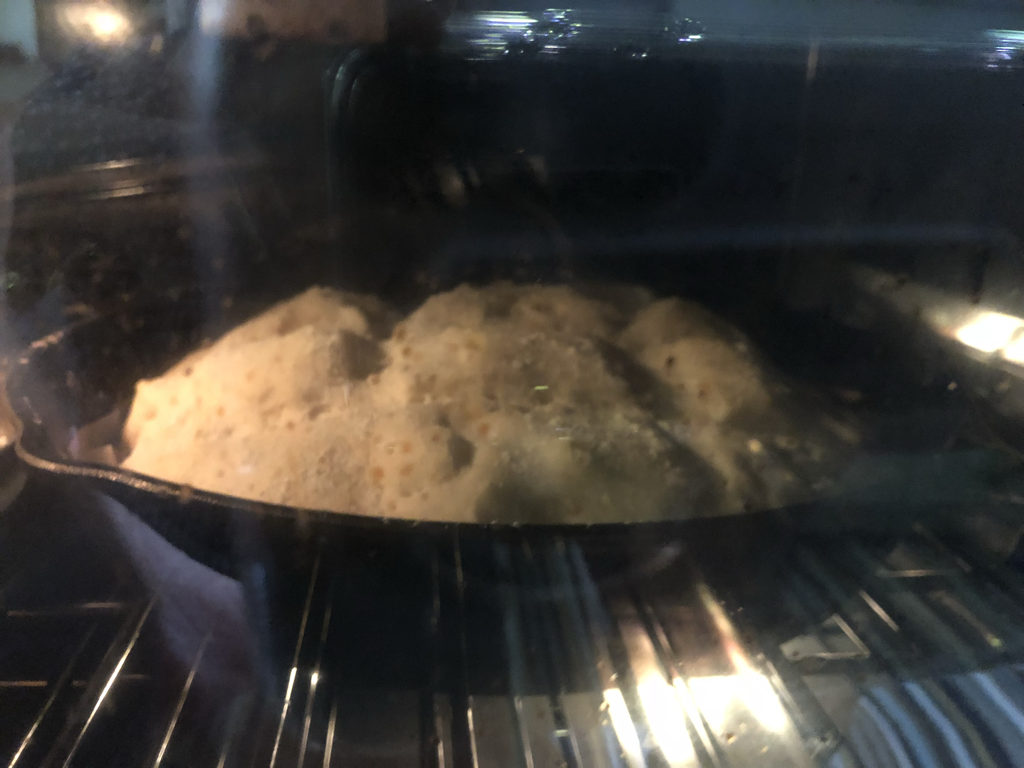 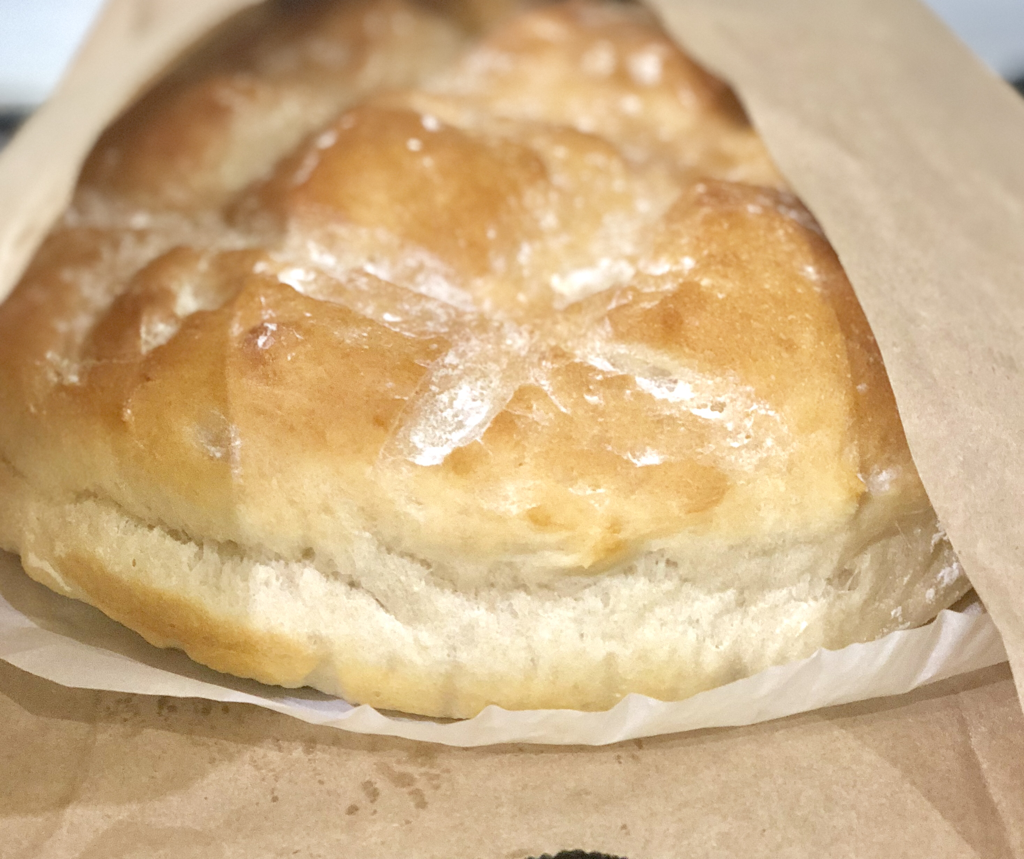 To make by hand using the same ingredients and corresponding measurements: Pour the sourdough starter into a large bowl. Add the maple syrup or sugar, salt, flour, and yeast and mix. Add the oil and gradually mix in the warm water. Knead well on a lightly floured surface for 10 minutes, dusting with flour as needed. Put in a baking pan lined with parchment paper and a dusting of flour. Leave in a warm place, like a microwave oven or toaster oven, to rise for 45 minutes or until the dough doubles in size. Score with a sharp blade on the surface of the dough as desired and dust the top with flour. Bake in a pre-heated oven at 375F for 45 minutes. You may use the same steaming technique described in the previous section for a softer crust. 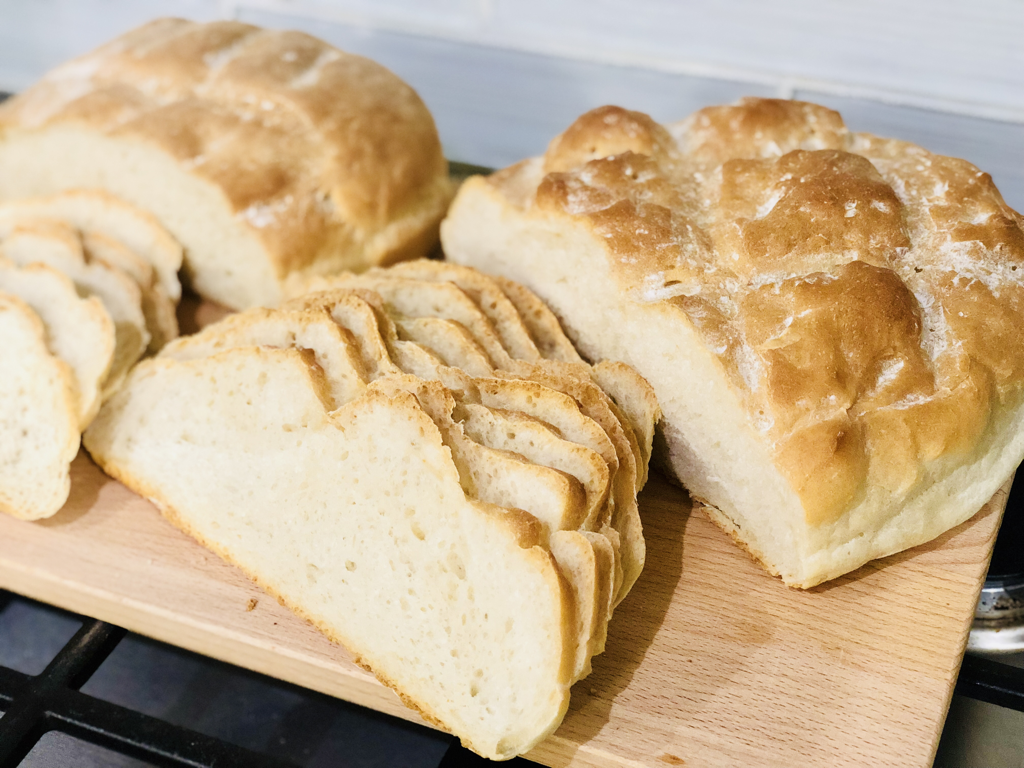 People cope differently when their oldest kid leaves the homestead and flies to a far away college campus in a different state. Some travel, take on new hobbies, volunteer in the community, or find a new job, while others grieve for a long time and stalk their children at all the social media outlets available to mankind to the point of their kids’ exasperation. As for me, I must have been bracing for the momentous event because weeks before her eventual departure, I adopted two pets. They’re not the furry nor scaly kind. Neither do they require significant time and resources that I definitely don’t have. Ever heard how much a private university costs these days? Even with the scholarship my child received, I still couldn’t afford a pet that walks or crawls or swim. Nor do I have the time to care for one. These two new pets of mine, however, require feeding, but I can put them to sleep when I’m away. No need to hand them to the neighbors or pet caretakers or lug them with me. The first one came to me by serendipity. I was on a training mode that day. College Transition 101 is one course that I had to shove on my daughter at the last minute when I realized how much I’ve failed as a mom in training her towards independence. Laundry skills, toilet and shower cleaning experience, sewing techniques, cooking styles, personal financial planning and management, and street smart common sense were part of the syllabus. So for the latter part, I had her download the Uber app to meet up with a friend. Me Mom, of course need to hover like a helicopter over this fine chick as she activated the app and rode the car that would bring us to this nice coffee and bakery shop in the Bishop Arts District in Dallas. I interviewed the driver quite a bit and realized I could make a living writing stories about Uber drivers. I met one in California who’s actually a CEO of his company and drives a couple of hours a day to keep his feet on the ground, much like my character, Dr. Anthony Sparker from my web novel. Anyway, when we got to this fancy bakery, and while my daughter ordered her coffee, my writer instinct perked up again upon seeing the D Magazine sign over the counter. Can I spin off another newsworthy article for this restaurant? I took some photos, just in case. My eyes landed on this big round package of sourdough bread beside the cashier. I took a piece from the sampling bowl and popped one in my mouth. It had a soft chewy bite with just a hint of sourness that puckers the inner lining of my cheeks. “How much are those?” I asked. “$9.00.” The young man behind the counter flashed his white teeth. I frowned. The cheapskate in me activated. Why would I spend that much on a bread when I bake my own almost everyday? I could buy three bags of 5-lb bread flour for that price that would feed my family for months. But I’ve been curious about sourdoughs and never got to experiment with sourdough starters. A plan brewed inside my cunning head. I gave this young man a huge smile, and said, “I bake my bread and I don’t want just the eggs, I want the goose that lays the eggs. Do you sell sourdough starters?” He batted his lids. I must have been the first customer who asked such a weird question. “Hold on, I’ll talk to the baker.” Go talk to your manager, if you must, I thought. I want my sourdough starter. A minute after, he came back and said, “Yes, you can have it for $9.00.” Yes! I fumbled inside my bag. Of course, of all days, I forgot my wallet! Lucky I didn’t drive a car. Now don’t ask me why my daughter is still working on getting her driver’s license at 18. I’m not talking to you. Talk to my insurance guy who thinks it’s okay to add a hefty amount into my spreadsheet of increasing expenses this year. Anyway, I called my daughter to pay for the bill and took my sweet bubbly baby nestled in the mason jar. I called him Baby Doughy. It was love at first bite when, after feeding him according to the baker’s instructions, and King Arthur’s Flour website, and mixing him with the right ingredients, a golden bread came out of my oven. 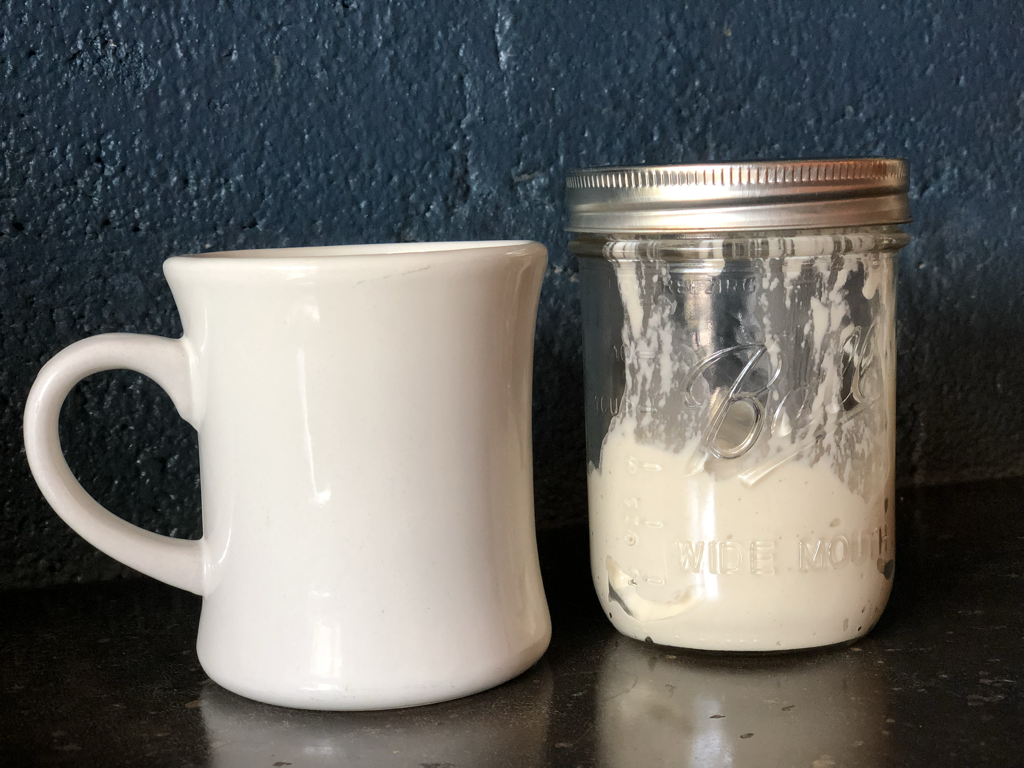  Ooh-la-la. That’s how I met my Baby Doughy. He is a gift that keeps on giving. Investment: $9.00 plus tax. He only eats all-purpose flour and water so if he goes gourmet on me (Bob’s Red Mill), I’d spend less than $5.00 per bag depending on which grocery I go to, and this would last him two weeks or so. Baby Doughy is not a picky eater though. Even the ones that cost about $2.44 per 5 lb (HEB brand from Central Market) makes him happy. Aldi sells their unbromated, unbleached all-purpose flour for about $1.52 per 5-lb bag. What a steal!
To bake the bread, I only use bread flour, oil, water, salt, maple syrup (my arthritic joints are not big fans of sugar, which causes them to swell and redden), and finally yeast. (Fast forward 2020: I only use flour, water, sourdough starter, and salt. Less is more). Some of my friends bake their breads without yeast, but I like mine soft, just like the store-bought brands, yet crusty and dense, unlike the store-bought brands. (Lesson learned, as of 2020: If you want a soft bread and don’t want the extra calories from butter, milk, or oil, just bake at a lower temp—350ish all throughout). So that’s baby number one. When Baby Doughy got too handful, my husband and I gave one jar to a couple. Guess what they gave us in return? Visit my site again to hear about baby number two. This one gave my Baby Doughy a fit when I put them together on the same shelf! Watch out for this feisty one in my next blog. By the way, I still have a younger daughter who’s 13 years old. She did say, “Mom, I’m still here!” when I took on these pets. Her older sister spoke words of wisdom when she said, “Don’t worry, she’s doing it to maintain the equilibrium.” I laughed and said, “Yes, you wouldn’t want all my mothering instincts showered on you and you alone. Mothering with a capital S is smothering.” That’s it, folks! Happy baking! |


 RSS Feed