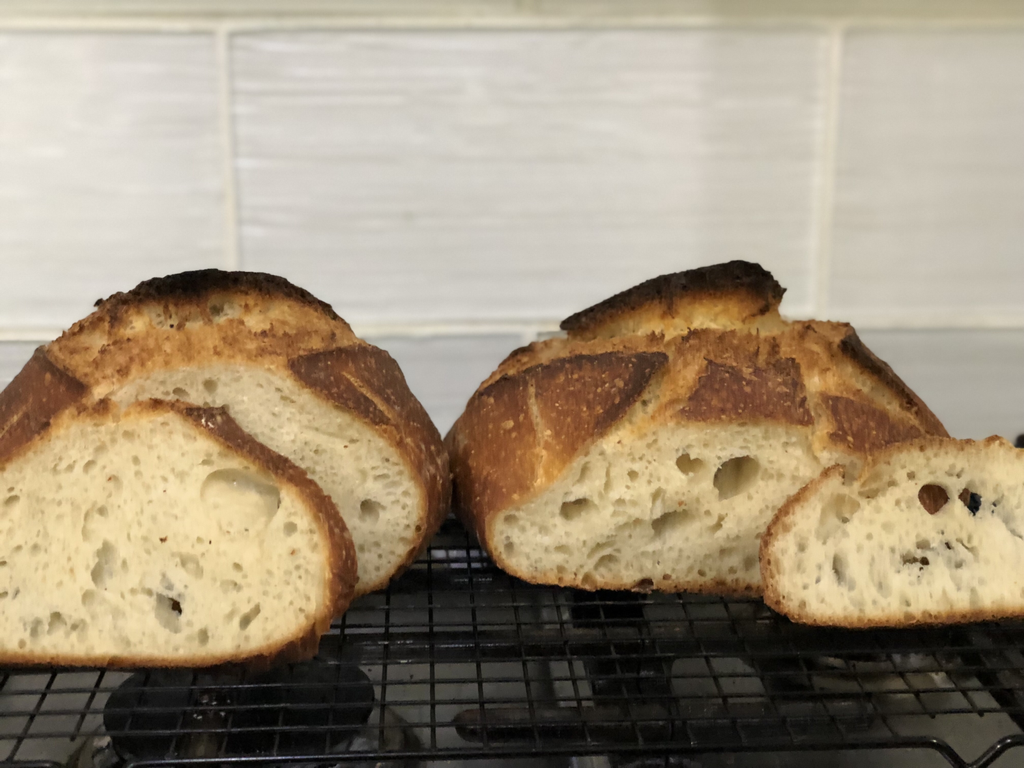
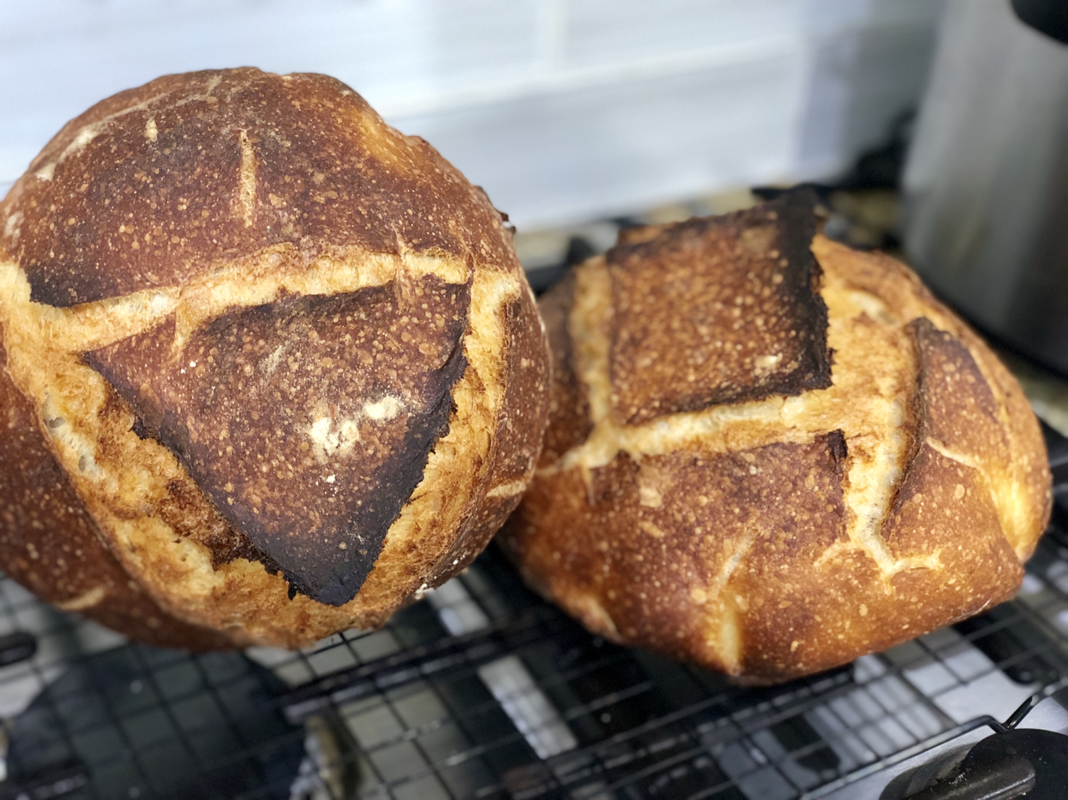
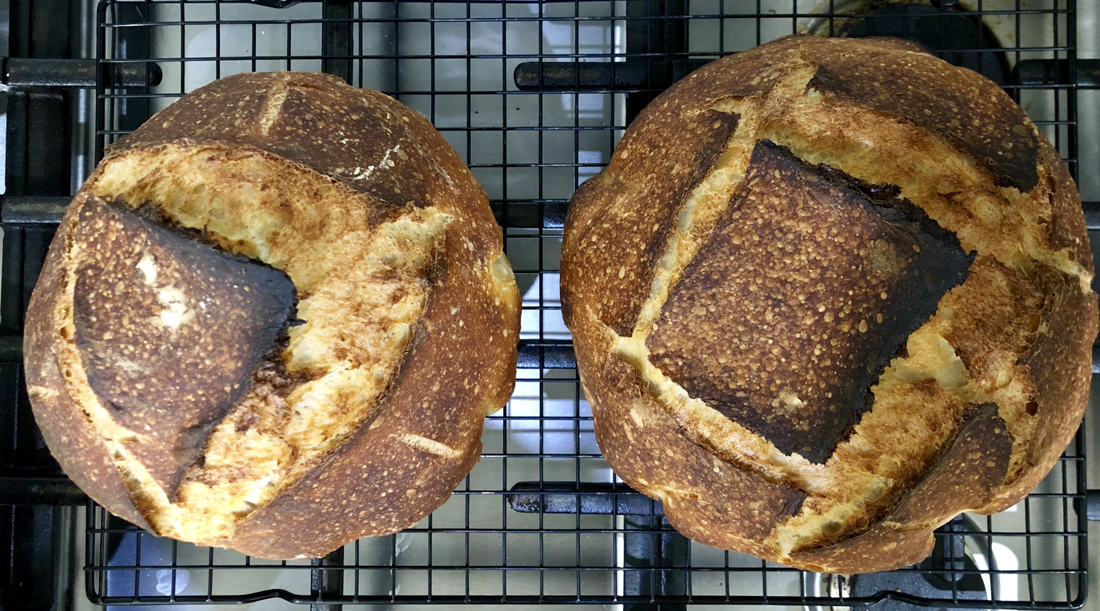
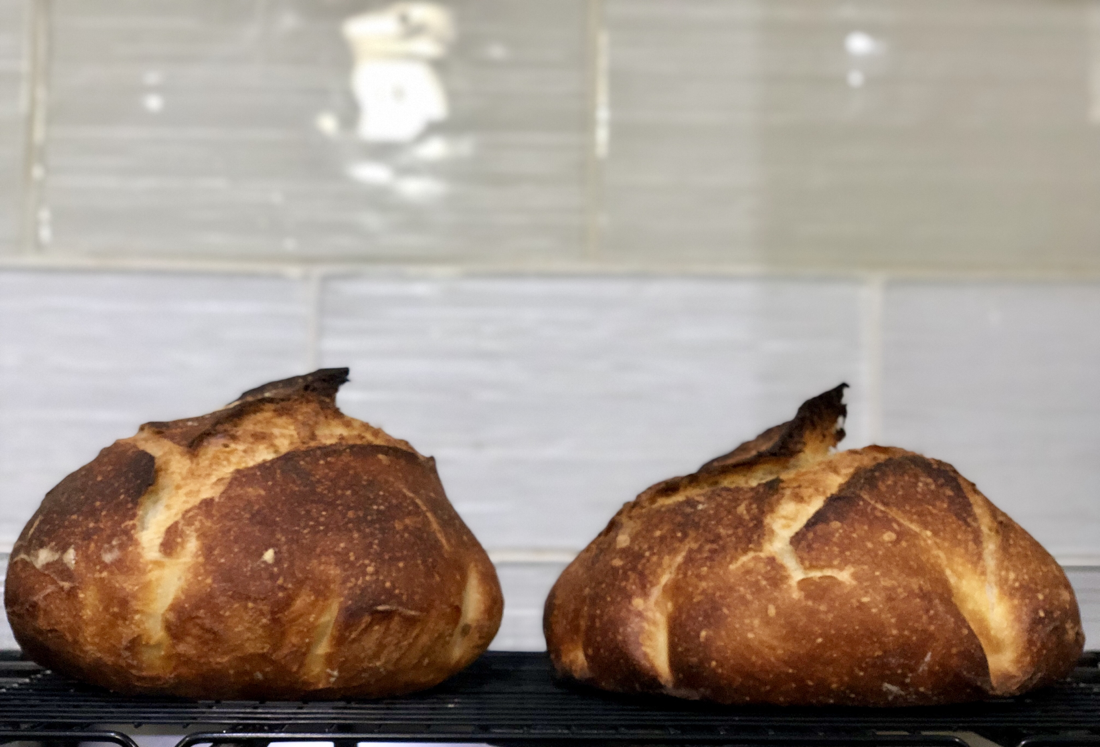
Those huge holes are epic in the craft of sourdough bread baking. It's the highest form of accomplishment you can achieve, along with the soft crumb and crispy crust. So what did I do right this time after months of experimentation? Pre-heating my baking pan (Dutch oven) with my oven at 500F! I also found more evidence of how a baking pan can affect the loaves: The bread baked using a Dutch oven (Right) spread out and was wider in diameter and lower in height because the size of the DO was wide (9”). The cover provided the steam. The bread baked using a skillet pan on the left (8”) rose by almost an inch more than the DO, but of course appeared smaller. Both pans were preheated with the oven. Using parchment paper made it easy to put the dough into both hot containers. 60% hydration. I also did something strange—I mixed all the ingredients from the start (no autolyse) and stored it directly into the refrigerator (hoping it’ll “knead” itself. But the next morning, the dough didn’t have the window pane sturdiness I had hoped for so I did one S&F and bench rest. After 2 hours, I formed them and rested again for an hour. Did final proof for 3 hours in a basket, transferred to preheated pan and baked with steam for 20 min (again a new thing for me coz I always do it for 30 min then 10-15 min without steam). This one I baked further without steam for 25 more minutes. But there was a difference in the crust. The DO-baked bread was crisper. And look at those crumbs. I’ve never had that much open crumb in my bread. Looks like I made it! I liked this best. This is the best burnt-looking loaves I had so far. #Tartine copycatwannabe Indeed persistence pays! 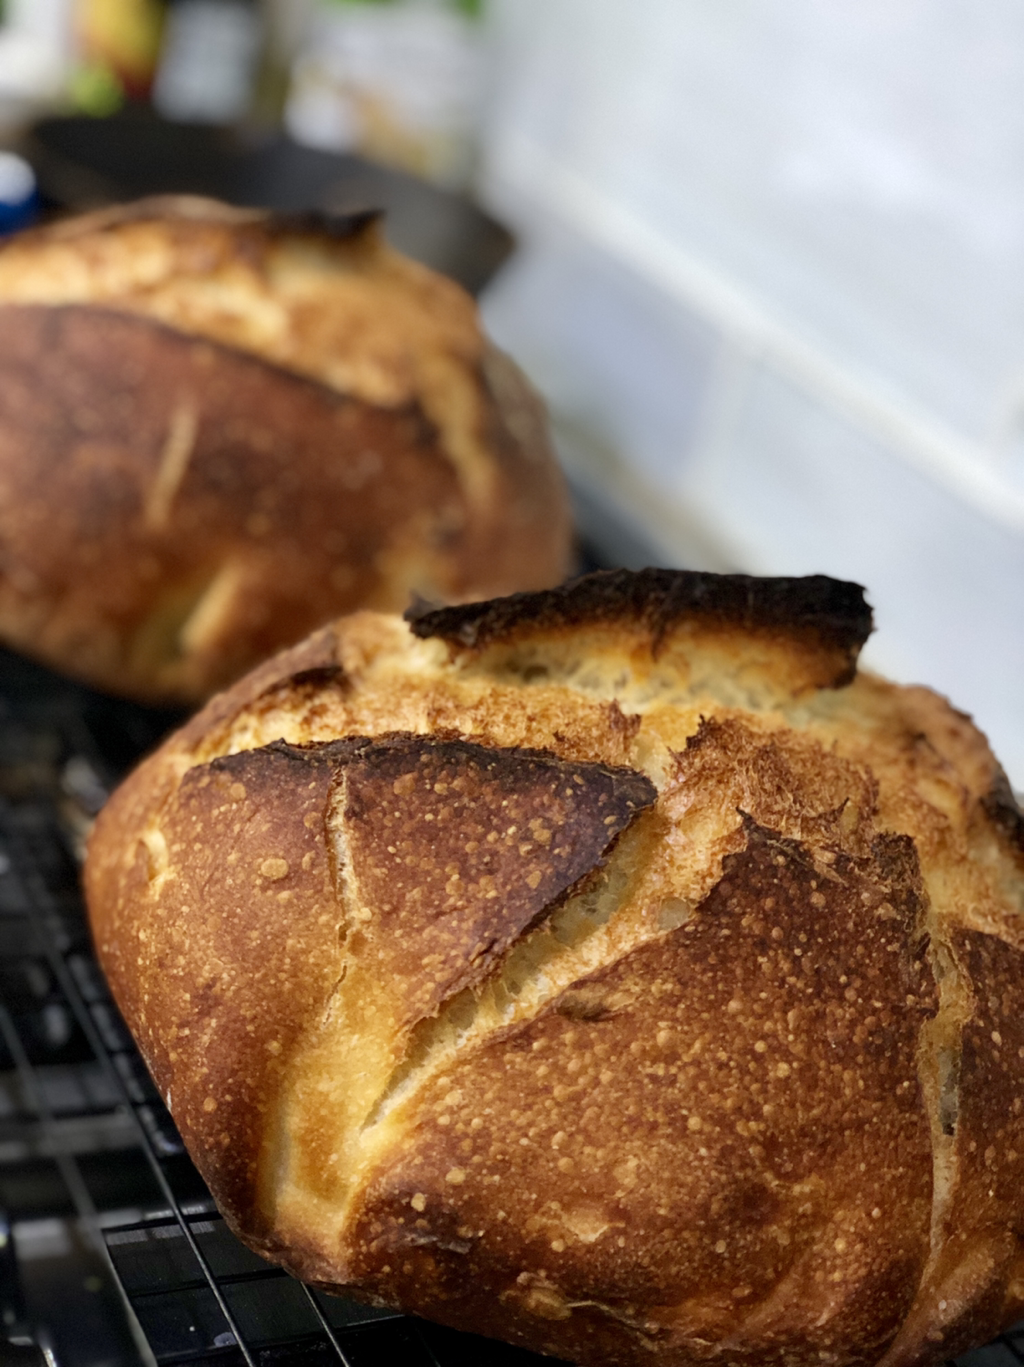
0 Comments
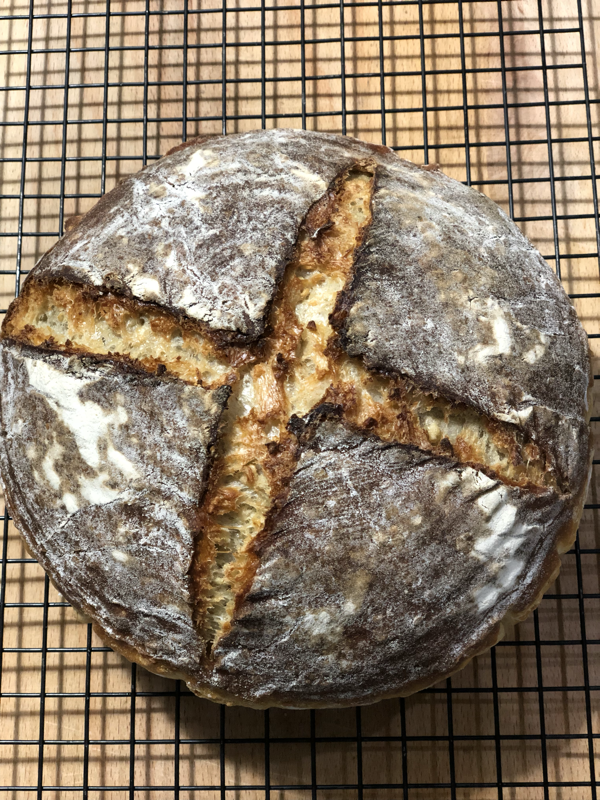
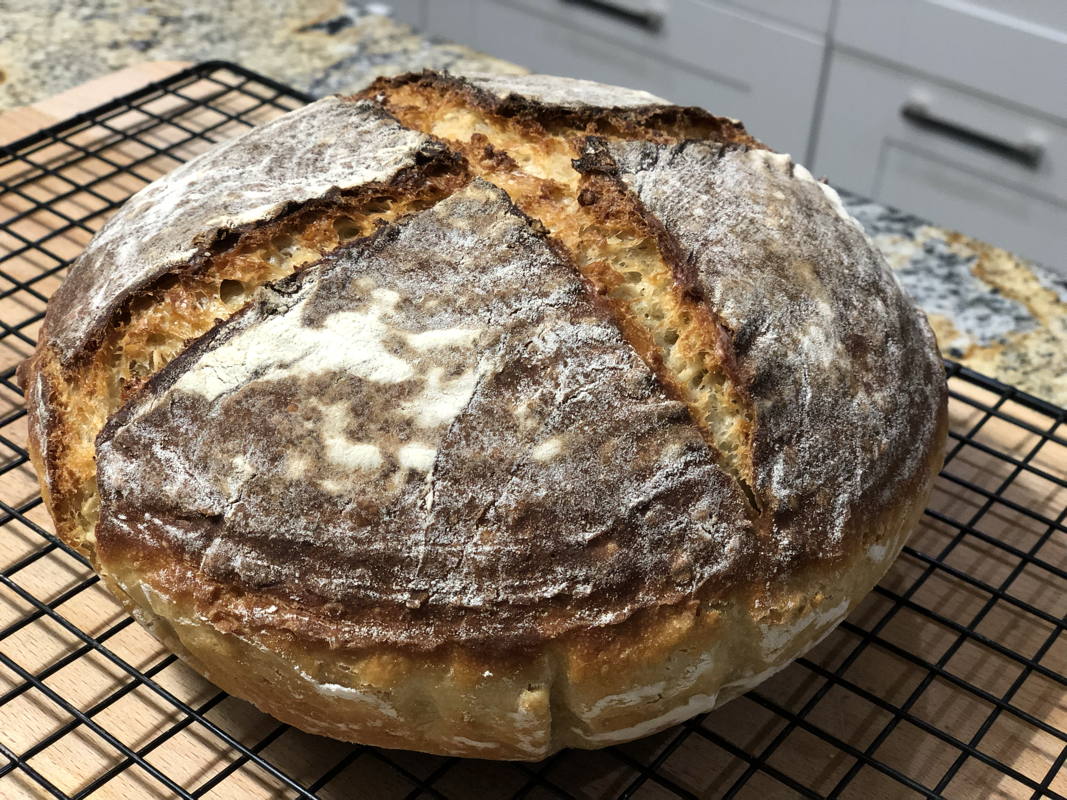
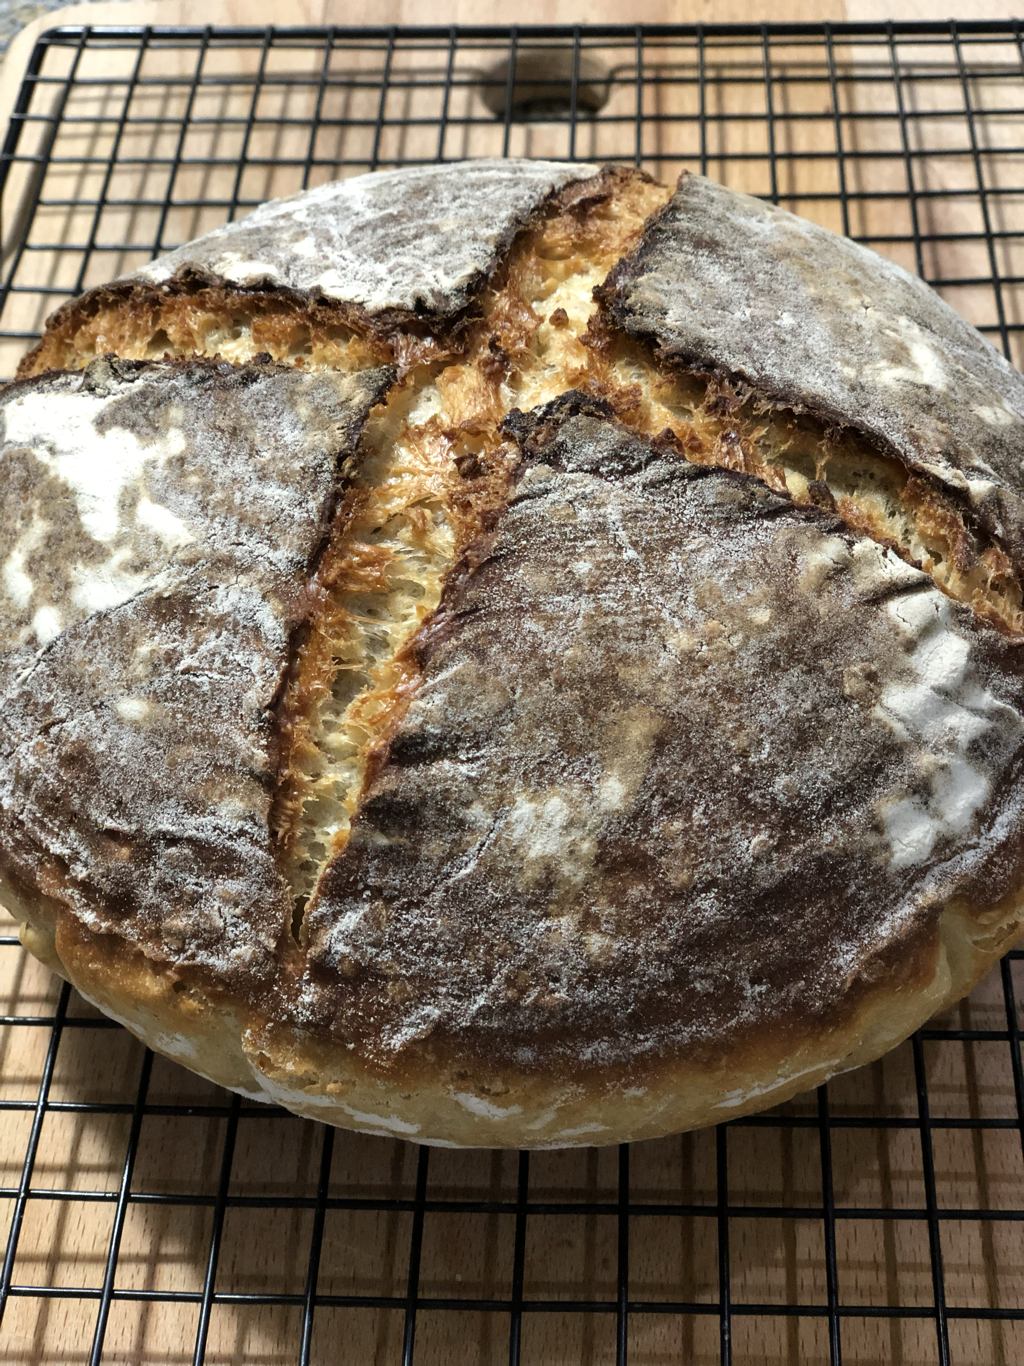 I put the least amount of work in this bread. No knead. No stretch & fold (S&F). Just the ingredient of TIME, allowing the natural yeasts and bacteria of the starter, which I got from Anne Beckham Gowens, to work. * Autolyze (flour, water, levain) for 3 hours. * Mixed the rest of my ingredients (oats, extra virgin olive oil, maple syrup, salt) and put on cold retard (refrigeration) for 21 hours * Formed to a boulle and proofed for 6hours in a proofing basket. * Baked at 450F x 30 min with steam then 10 min at 400F without steam. Sourdough lingo from this blog for the newbies:
Sourdough starter - this is your fermented flour and water which has all the good bacteria and yeast from the environment. You can make one, obtain from a friend or bakery, or ask me. I can mail one to you and just pay for postage. Levain - This is your sourdough starter that you’ve fed and ready to add as an ingredient to your recipe. This substitutes for the commercial yeast you normally put in your bread. It has the natural yeasts and good bacteria from the environment. Autolyze - This happens when you mix your ingredients of flour, water, and levain and leave it for at least 30 minutes to a couple of hours to allow the levain to work on the dough. Instead of you kneading your bread to form a good matrix in your dough, you allow the levain to do the work. You don’t add salt at this point because it will slow down the process. Cold Retard - This is when you put your dough, with all your additional ingredients of salt, sweetener (I prefer natural ones like honey and maple syrup), etc. in the refrigerator to slow down the process of fermentation if you don’t want to bake the bread immediately. I have done 6 days of cold retard and the bread was good! S&F - the process of stretching and folding the dough instead of the usual kneading. This is done by pulling the dough from one end and folding it to itself. You repeat the process from all four sides. It’s less messy because you use the same container to do the work. Steam - put a pan at the bottom of the oven and pour water to steam the dough while baking. Spray water inside the oven when you put your bread in to bake for added steam. You can also use a Dutch oven with cover and this steams the bread from within. I found the water on the pan more reliable in producing oven spring. Oven spring - when the dough rises further to its full size while baking in the oven. Factors that can make a good spring are: ripeness of your levain (make sure it floats on the water before using it for your dough), added steam in your oven, hydration of the dough (wet dough on a flat container will produce a flat bread), proofing (overproofing dampen your spring). |

 RSS Feed